Roasted Grape, Arugula + Goat Cheese Baked Potatoes

IMG_1644.jpg

Soft and well-seasoned potato with peppery arugula and roasted grapes that are insanely good, especially when mixed with honey and goat cheese.

It’s one of the simplest meals you can make and guaranteed to be one of your absolute favorites.

Roasted Grape, Arugula + Goat Cheese Baked Potatoes

makes: 4 baked potatoes
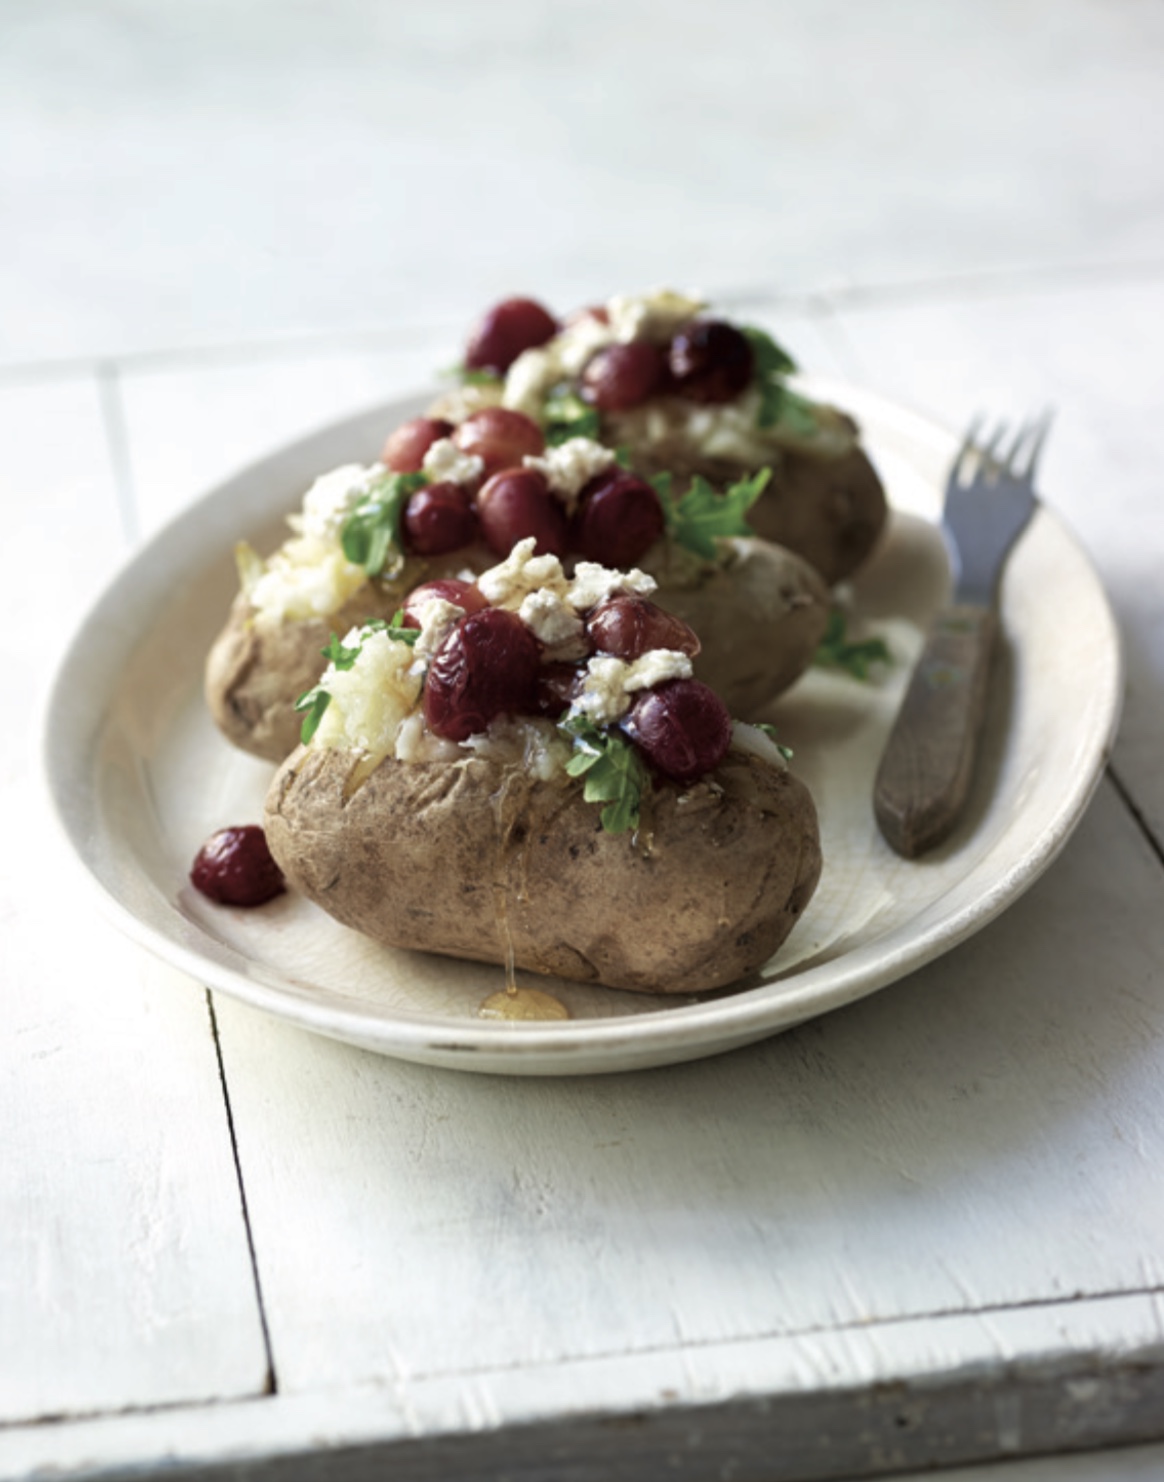
Ingredients:

  • 4 Idaho potatoes, scrubbed + dried
  • 2 tablespoons olive oil
  • 1½ teaspoons kosher salt
  • 2 cups red grapes
  • ¼ teaspoon ground black pepper
  • 2 cups lightly packed, coarsely chopped arugula
  • 4 ounces soft garlic + herb goat cheese log, crumbled
  • ¼ cup honey

Directions:

  1. Preheat the oven to 400°F. Prick each potato with a fork 5 to 10 times. Rub 1 tablespoon of the oil over the potatoes and sprinkle them with ¼ teaspoon of the salt. Place them in the heated oven, directly on the rack, and bake until they are soft when squeezed—45 to 60 minutes.
  2. Meanwhile, toss the grapes with the remaining 1 tablespoon oil, ¼ teaspoon of the salt, and the pepper on a rimmed baking sheet or in a medium baking dish. When the potatoes have about 20 minutes baking time left, place the grapes in the oven; when the potatoes are done the grapes should be slightly shriveled and starting to burst open.
  3. Slice each potato lengthwise, cutting about three-quarters of the way down. Push the ends of each toward the middle to open up a crevice. Divide ½ teaspoon of the salt over the 4 crevices and then fluff each with a fork. Add one-quarter of the arugula to each potato and divide the remaining ½ teaspoon salt over all 4; fluff again to mix the potato flesh and the arugula (you want to try and salt the entire inside of the potato).
  4. To serve, place each potato on a plate. Divide the cheese and grapes among them, filling the crevices, and then drizzle 1 tablespoon honey over each. Eat right away!
: @NikkiDinki

: @NikkiDinkiCooking
 

Find more recipes like this in MORE VEGGIES PLEASE!


You might also like these recipes:

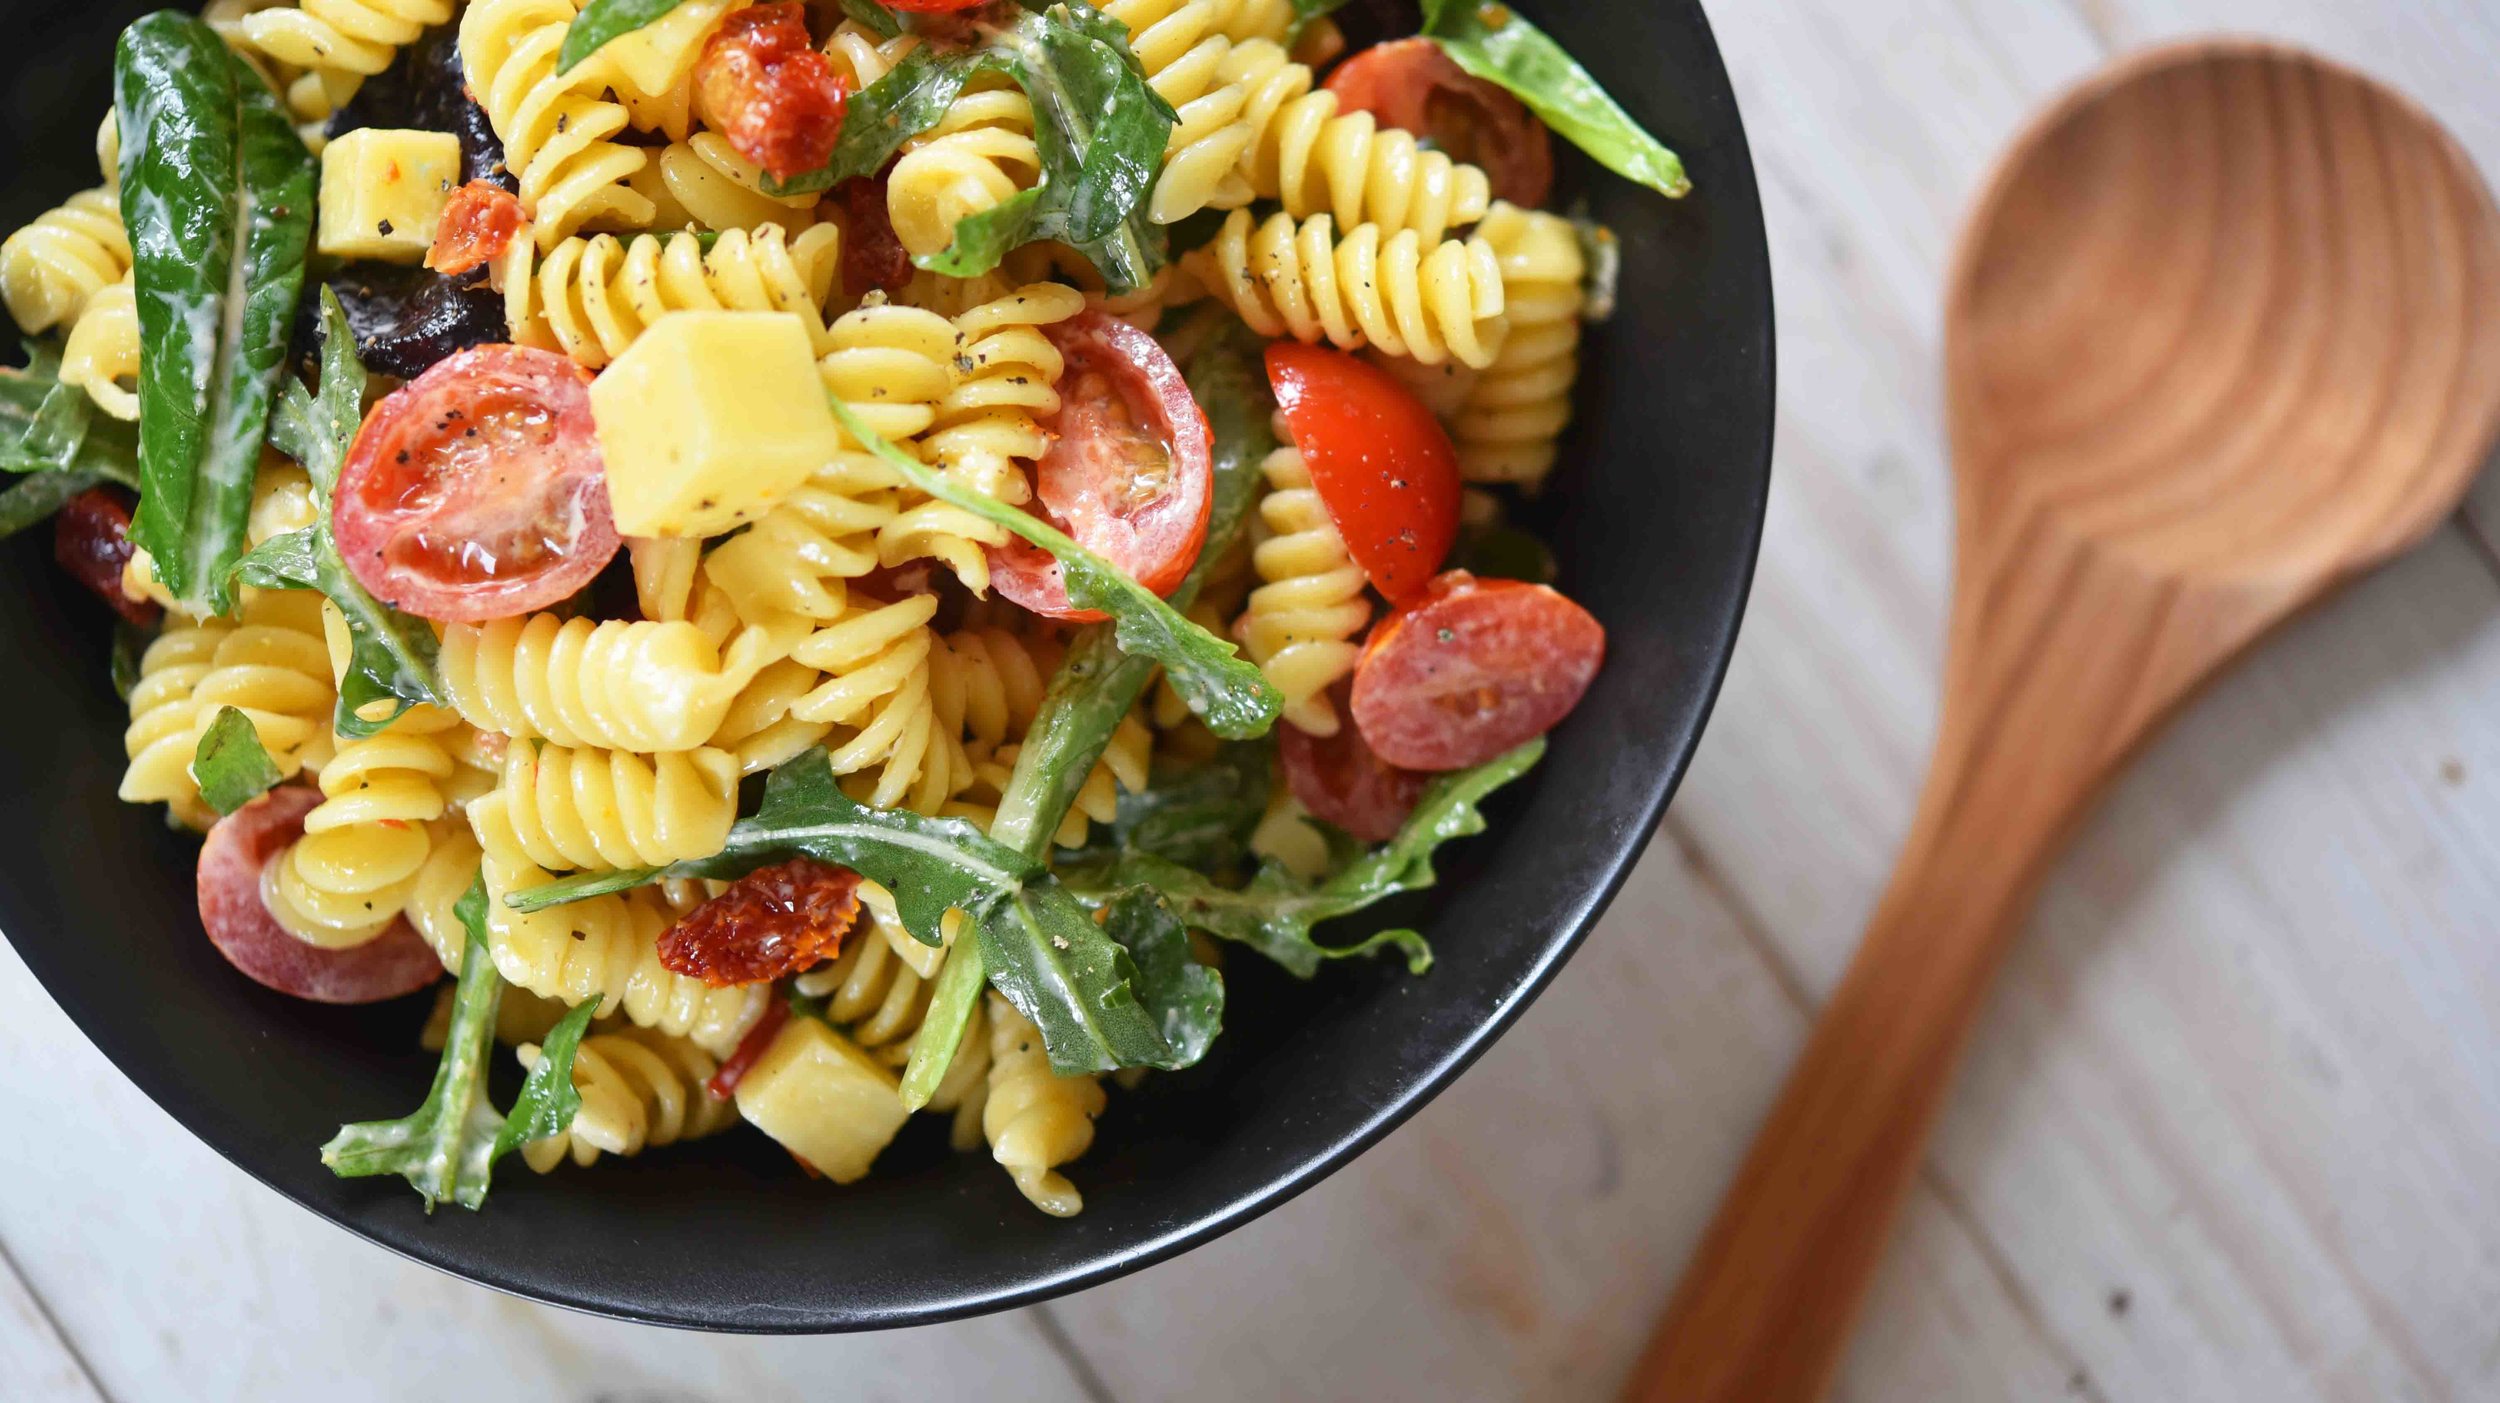
BLT Pasta Salad with Romaine Lettuce Dressing

BLT Pasta Salad.jpg

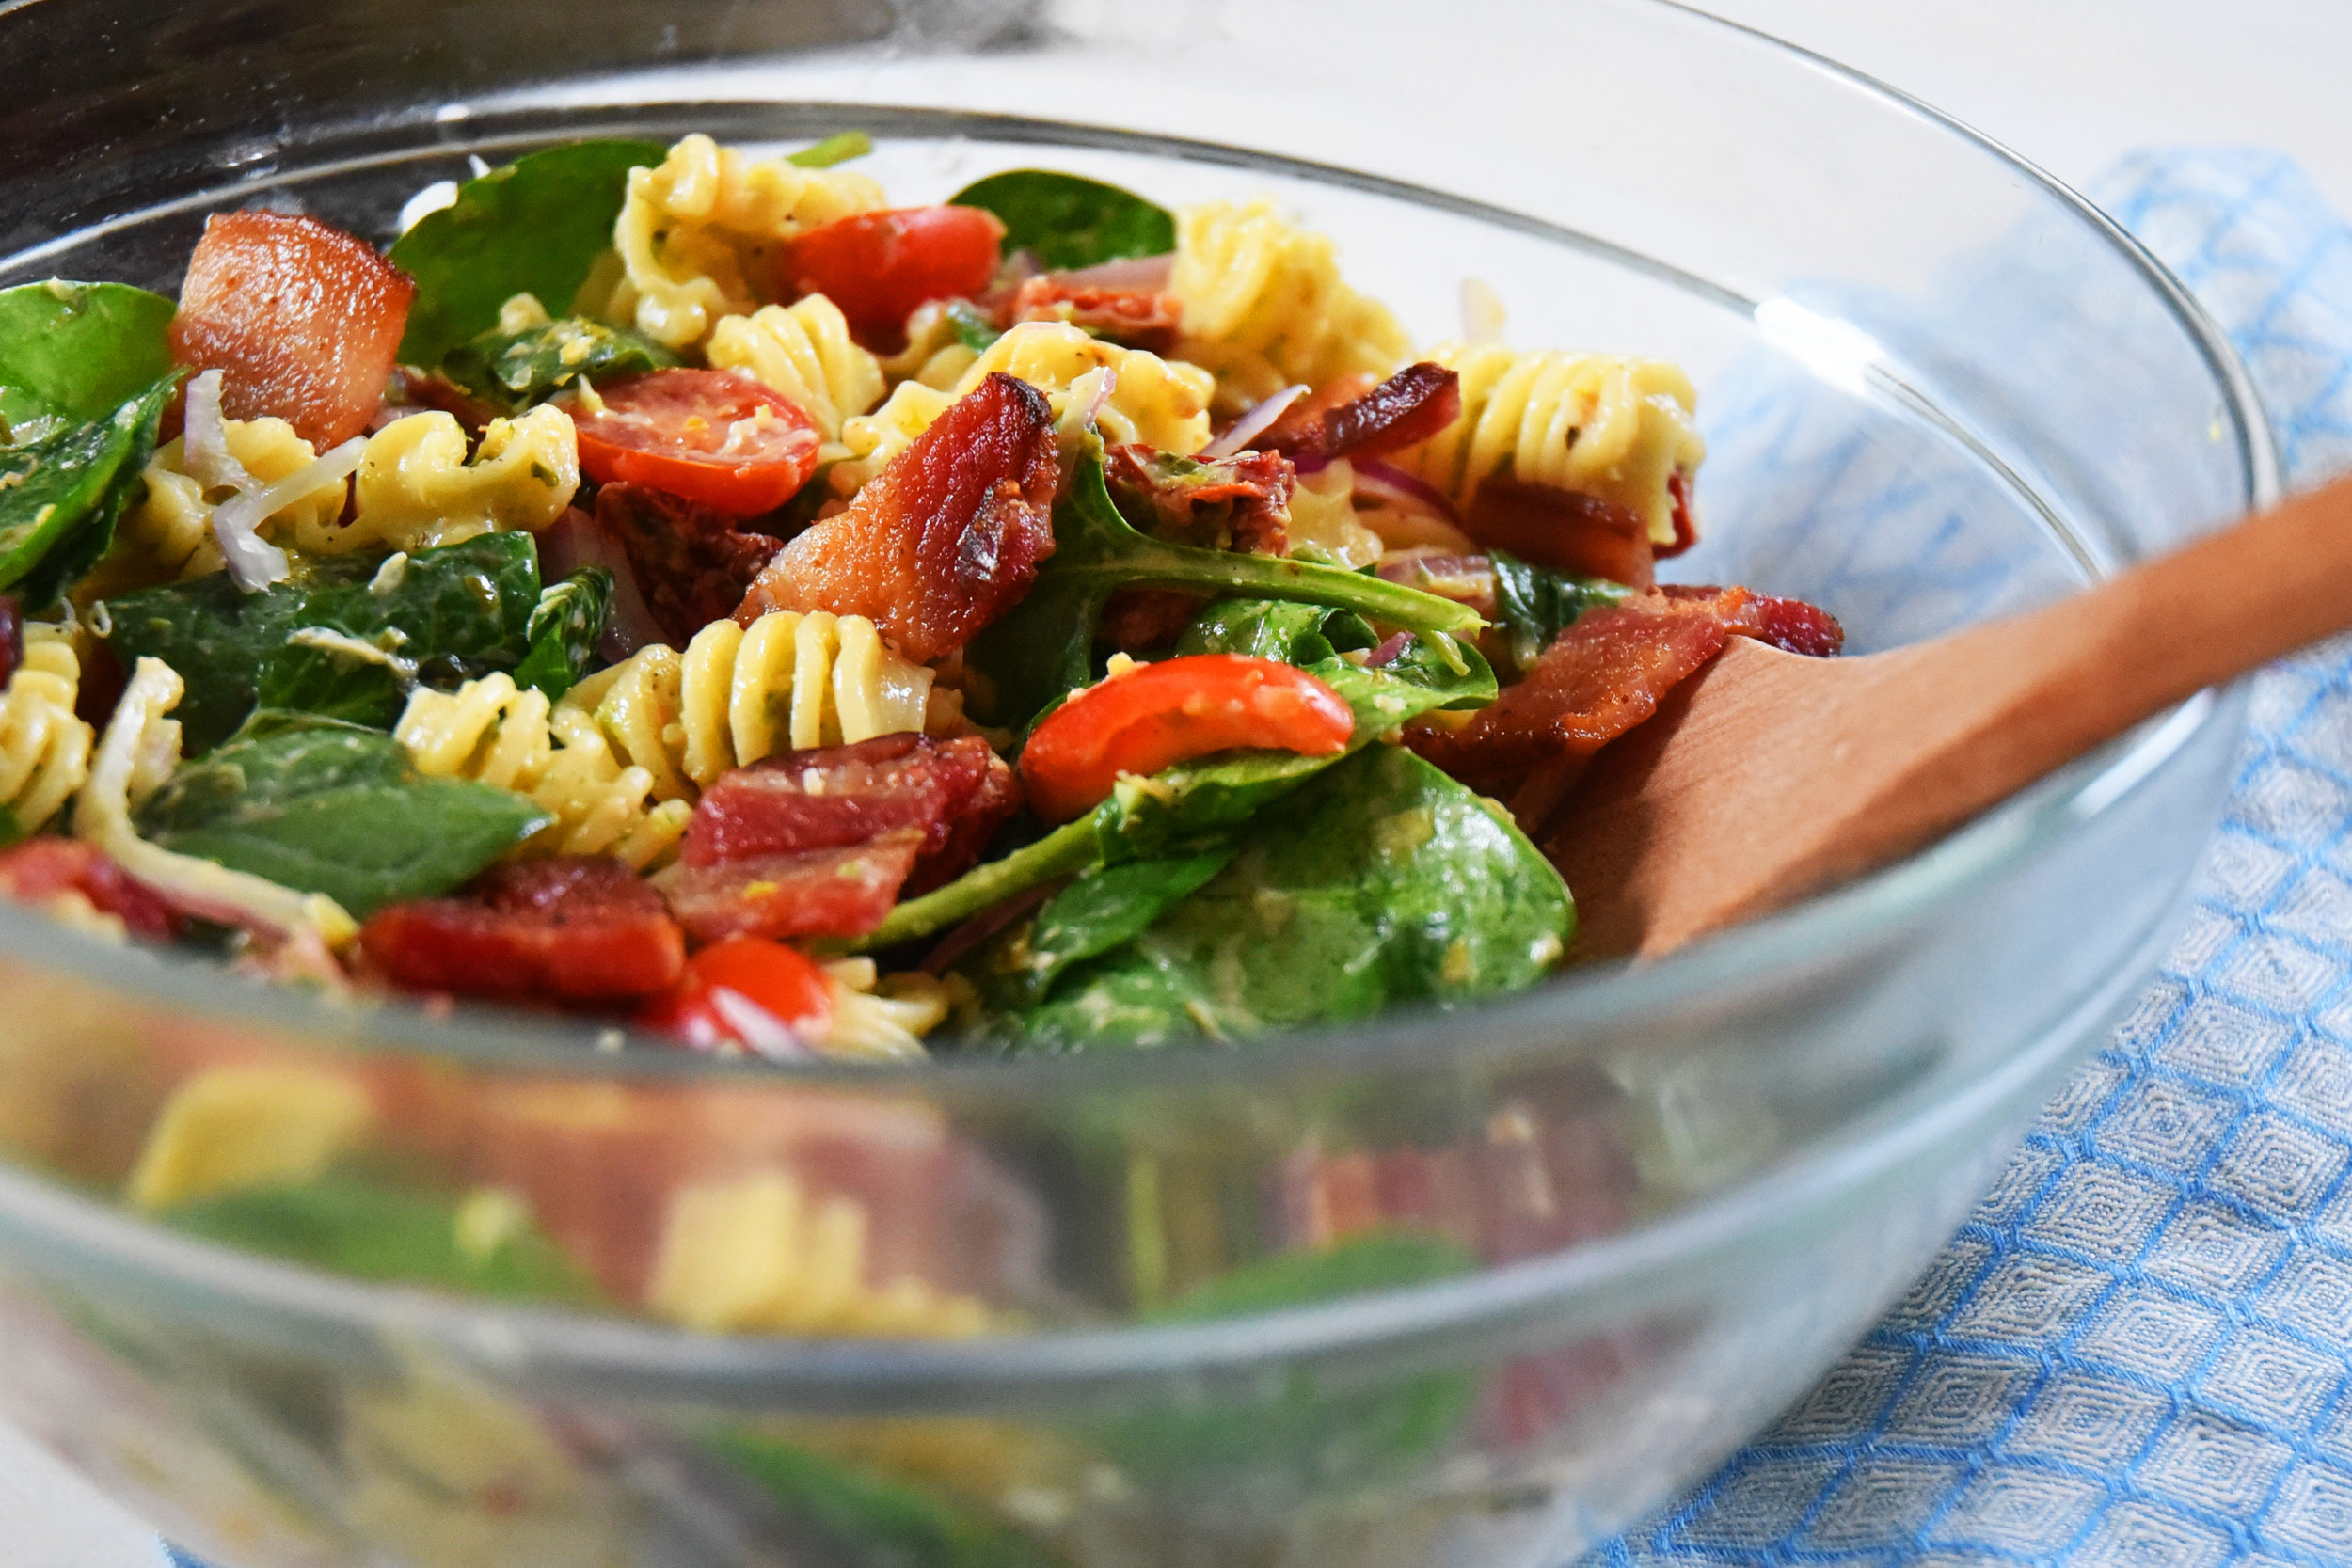
This dish will be your new go-to—BLT Pasta Salad with Romaine Lettuce Dressing.

Yes, the dressing is actually made with lettuce!

Combined with the classic flavors of a BLT sandwich (minus the bread), it's the perfect dish to ring in Summer!

BLT Pasta Salad with Romaine Lettuce Dressing

servings: 4 to 6 servings, with about 2 cups Romaine Lettuce Dressing

Romaine Lettuce Dressing:

  • 2 romaine hearts, halved
  • 5 tablespoons olive oil
  • ½ cup Greek yogurt
  • Juice of 1 lemon
  • 2 teaspoons Dijon mustard
  • 1 teaspoon kosher salt
  • ½ teaspoon ground black pepper

BLT Pasta Salad:

  • 1 pound short-cut pasta
  • 4 strips extra thick-cut bacon
  • 2 cups Romaine Lettuce Dressing
  • 2 cups lightly packed baby spinach or chopped romaine
  • 2 cups halved grape tomatoes
  • 1 cup finely chopped sundried tomatoes
  • 1 small red onion, very thinly sliced (about 1 cup)
  • 1 teaspoon kosher salt
  • ½ teaspoon ground black pepper

Romaine Lettuce Dressing:

  1. Heat a grill pan over high heat. Then brush the 4 lettuce halves on the cut side with 1 tablespoon of the oil. Grill the lettuce cut-side-down until it is slightly charred and wilted—about 2 to 3 minutes. Remove the lettuce from the grill pan, coarsely chop it and discard the stems.
  2. Combine the lettuce, remaining 4 tablespoons of oil, yogurt, lemon juice, mustard, salt, and pepper in a food processor or blender. If all of the lettuce does not fit at one time, puree a portion of it, adding more as you do, until it is all in the food processor. Once it has all been pureed, set it aside for later.

BLT Pasta Salad:

  1. Place a large pot of salted water over high heat. When the water boils, add the pasta and cook it according to the package directions. Then drain it, rinse it under cold water, and set it aside.
  2. While the pasta cooks, in a large skillet over medium heat, cook the bacon until it is crispy—about 7 minutes. Transfer the bacon to paper towels. Once it is cool enough to handle, coarsely chop it; this should give you about 1½ cups of bacon pieces. Set the bacon aside for later.
  3. Toss the pasta with the Romaine Lettuce Dressing, spinach or romaine, grape tomatoes, sundried tomatoes, onion, salt, and pepper. Top it with the bacon and serve!
: @NikkiDinki

: @NikkiDinkiCooking
 

Find more recipes like this in MORE VEGGIES PLEASE!


YOu might also like these recipes:

Celeriac + Lobster Rolls topped with Fennel + Apple Slaw

Ch_4_Lobster_Roll_86145 EDITED.jpg

I’ve come up with lots of great recipes over the years (I might be a little biased?).

But this one really takes the cake—or the roll.

There's the fresh, yet hearty, caramelized celeriac that perfectly compliments the lobster, and then the crisp apple and fennel slaw with a hint of orange...

It hits every high note.

This is the kind of dish I make for company, or when I need to do something nice for my husband.

It’s really special, but not so fancy where you won't want to devour the whole thing in two bites.

Okay, four bites.

See? I’m dainty.

Celeriac + Lobster Rolls topped with Fennel + Apple Slaw

makes: 4 sandwiches

Fennel + Apple Slaw:

  • 1 small fennel bulb, very thinly sliced (about 1½ cups)
  • 1 Red Delicious apple, cut into long, thin strips
  • 1 jalapeño chile or Fresno chile, seeds and ribs removed, minced
  • Juice of 1 lemon
  • Juice of ½ orange
  • ½ teaspoon kosher salt

Basil + Lemon Aioli :

  • 1 large egg yolk
  • 1 teaspoon Dijon mustard
  • 1 small garlic clove
  • 1 tablespoon white wine vinegar
  • 1 teaspoon kosher salt
  • Finely grated zest of ½ lemon
  • Juice of 1 lemon
  • ½ cup vegetable oil
  • ¼ cup coarsely chopped fresh basil leaves

Celeriac + Lobster Rolls:

  • 1 tablespoon olive oil
  • 1 celeriac (1½ to 2 pounds), peeled and cut into ¼-inch cubes
  • 1 teaspoon kosher salt
  • 2 tablespoons unsalted butter
  • 4 split-top hot dog rolls
  • 9 ounces fresh lobster meat (equivalent to one 3-pound lobster), coarsely chopped

Fennel + Apple Slaw:

  1. Mix the fennel, apples, jalapeño, lemon juice, orange juice, and salt in a large bowl, stirring until well combined. Set aside on the countertop to let the fennel and apples soften while you prepare the rest of the sandwich.

Basil + Lemon Aioli :

  1. Add the egg yolk, mustard, and garlic to a blender and blend on high for 10 seconds. Add the vinegar, salt, lemon zest, and lemon juice and blend again for 10 seconds. With the blender running, very slowly drizzle in the oil, starting with a few drops at a time. After you have added 2 to 4 tablespoons of oil and the aioli has emulsified and you see no separation, you can add the remaining oil in a faster stream as the blender continues to run. Scrape the thickened aioli into a small bowl and stir in the basil. Set aside.

Celeriac + Lobster Rolls:

  1. Heat the oil in a large skillet over medium-high heat. Stir in the celeriac, sprinkle with the salt, and stir again. Cook until the celeriac is tender and browned on all sides, 10 to 12 minutes.
  2. Meanwhile, melt the butter in a second large skillet or a griddle over medium heat. Add the rolls and cook until browned on the sides, 2 to 4 minutes.
  3. As soon as the celeriac is cooked, reduce the heat to low and stir the lobster into the skillet. Cook until warmed through, 2 to 3 minutes. Remove the skillet from the heat. Add the aioli and stir until well combined.
  4. Spoon the lobster mixture into the rolls, dividing it equally. Top each roll with one-quarter of the slaw.

Notes:

  • If you’re not in the mood to make your own aioli, skip it and use ¾ cup mayonnaise instead, adding the basil, a squeeze of lemon juice and a little grated garlic.
  • Fennel has a nice licorice flavor, but can be replaced with a small red onion or cabbage in a pinch. If you have some tarragon on hand add it when using these substitutes.
  • Go ahead, make the slaw in advance. You’ll get a jump on the prep and the longer it sits, the better it gets.
  • For simpler slaw use, ¼ teaspoon crushed red pepper flakes instead of the hot pepper, and just lemon juice instead of both juices.
  • Make this a meal a bit more accessible by substituting shrimp for the lobster. Or for a different take on things, chopped chicken breast makes for one heck of a tasty sandwich, too!
: @NikkiDinki

: @NikkiDinkiCooking
 

Find more recipes like this in MORE VEGGIES PLEASE!


You might also like these recipes:

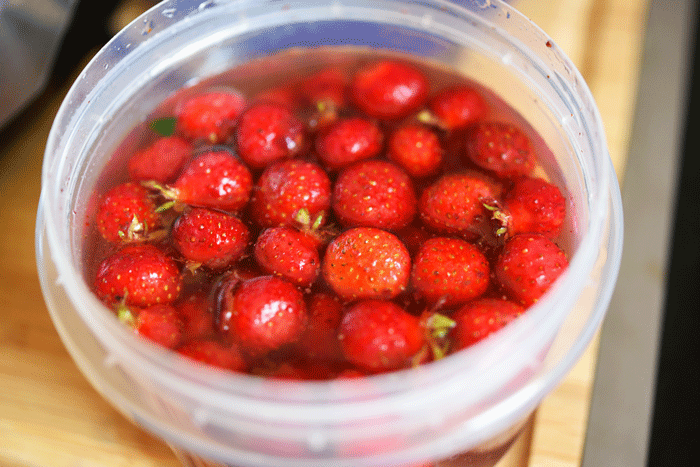
Pickled Strawberry Flatbread


Someone recently pointed out to me that I tend to weave fruits into my savory dishes more than the average person.


I never really thought about it, but I guess they're right.


It's just that sometimes when I'm thinking about what a dish needs to make it really delicious, pears, blackberries--or in this case--strawberries, just seem like the perfect adds.


Read More

Zucchini Soup

Zuke 1.jpg

Tomato soup is fantastic!

And it’s great for those cold months when you really just need some tomato soup and grilled cheese in your belly…

Zucchini Soup 1(1).jpg

But hopefully those months will be behind us soon…

And tomato soup’s cousin has come to town, ready to play!

Zucchini Soup 2(1).jpg

I thought it would be fun to experiment with some zucchini and make it into a soup.

But at the same time I say that, I honestly had no idea it would be this good!

Zucchini Soup 3(1).jpg

Start with some onions and garlic (obviously, the best way to start!)…

Zucchini Soup 4(1).jpg

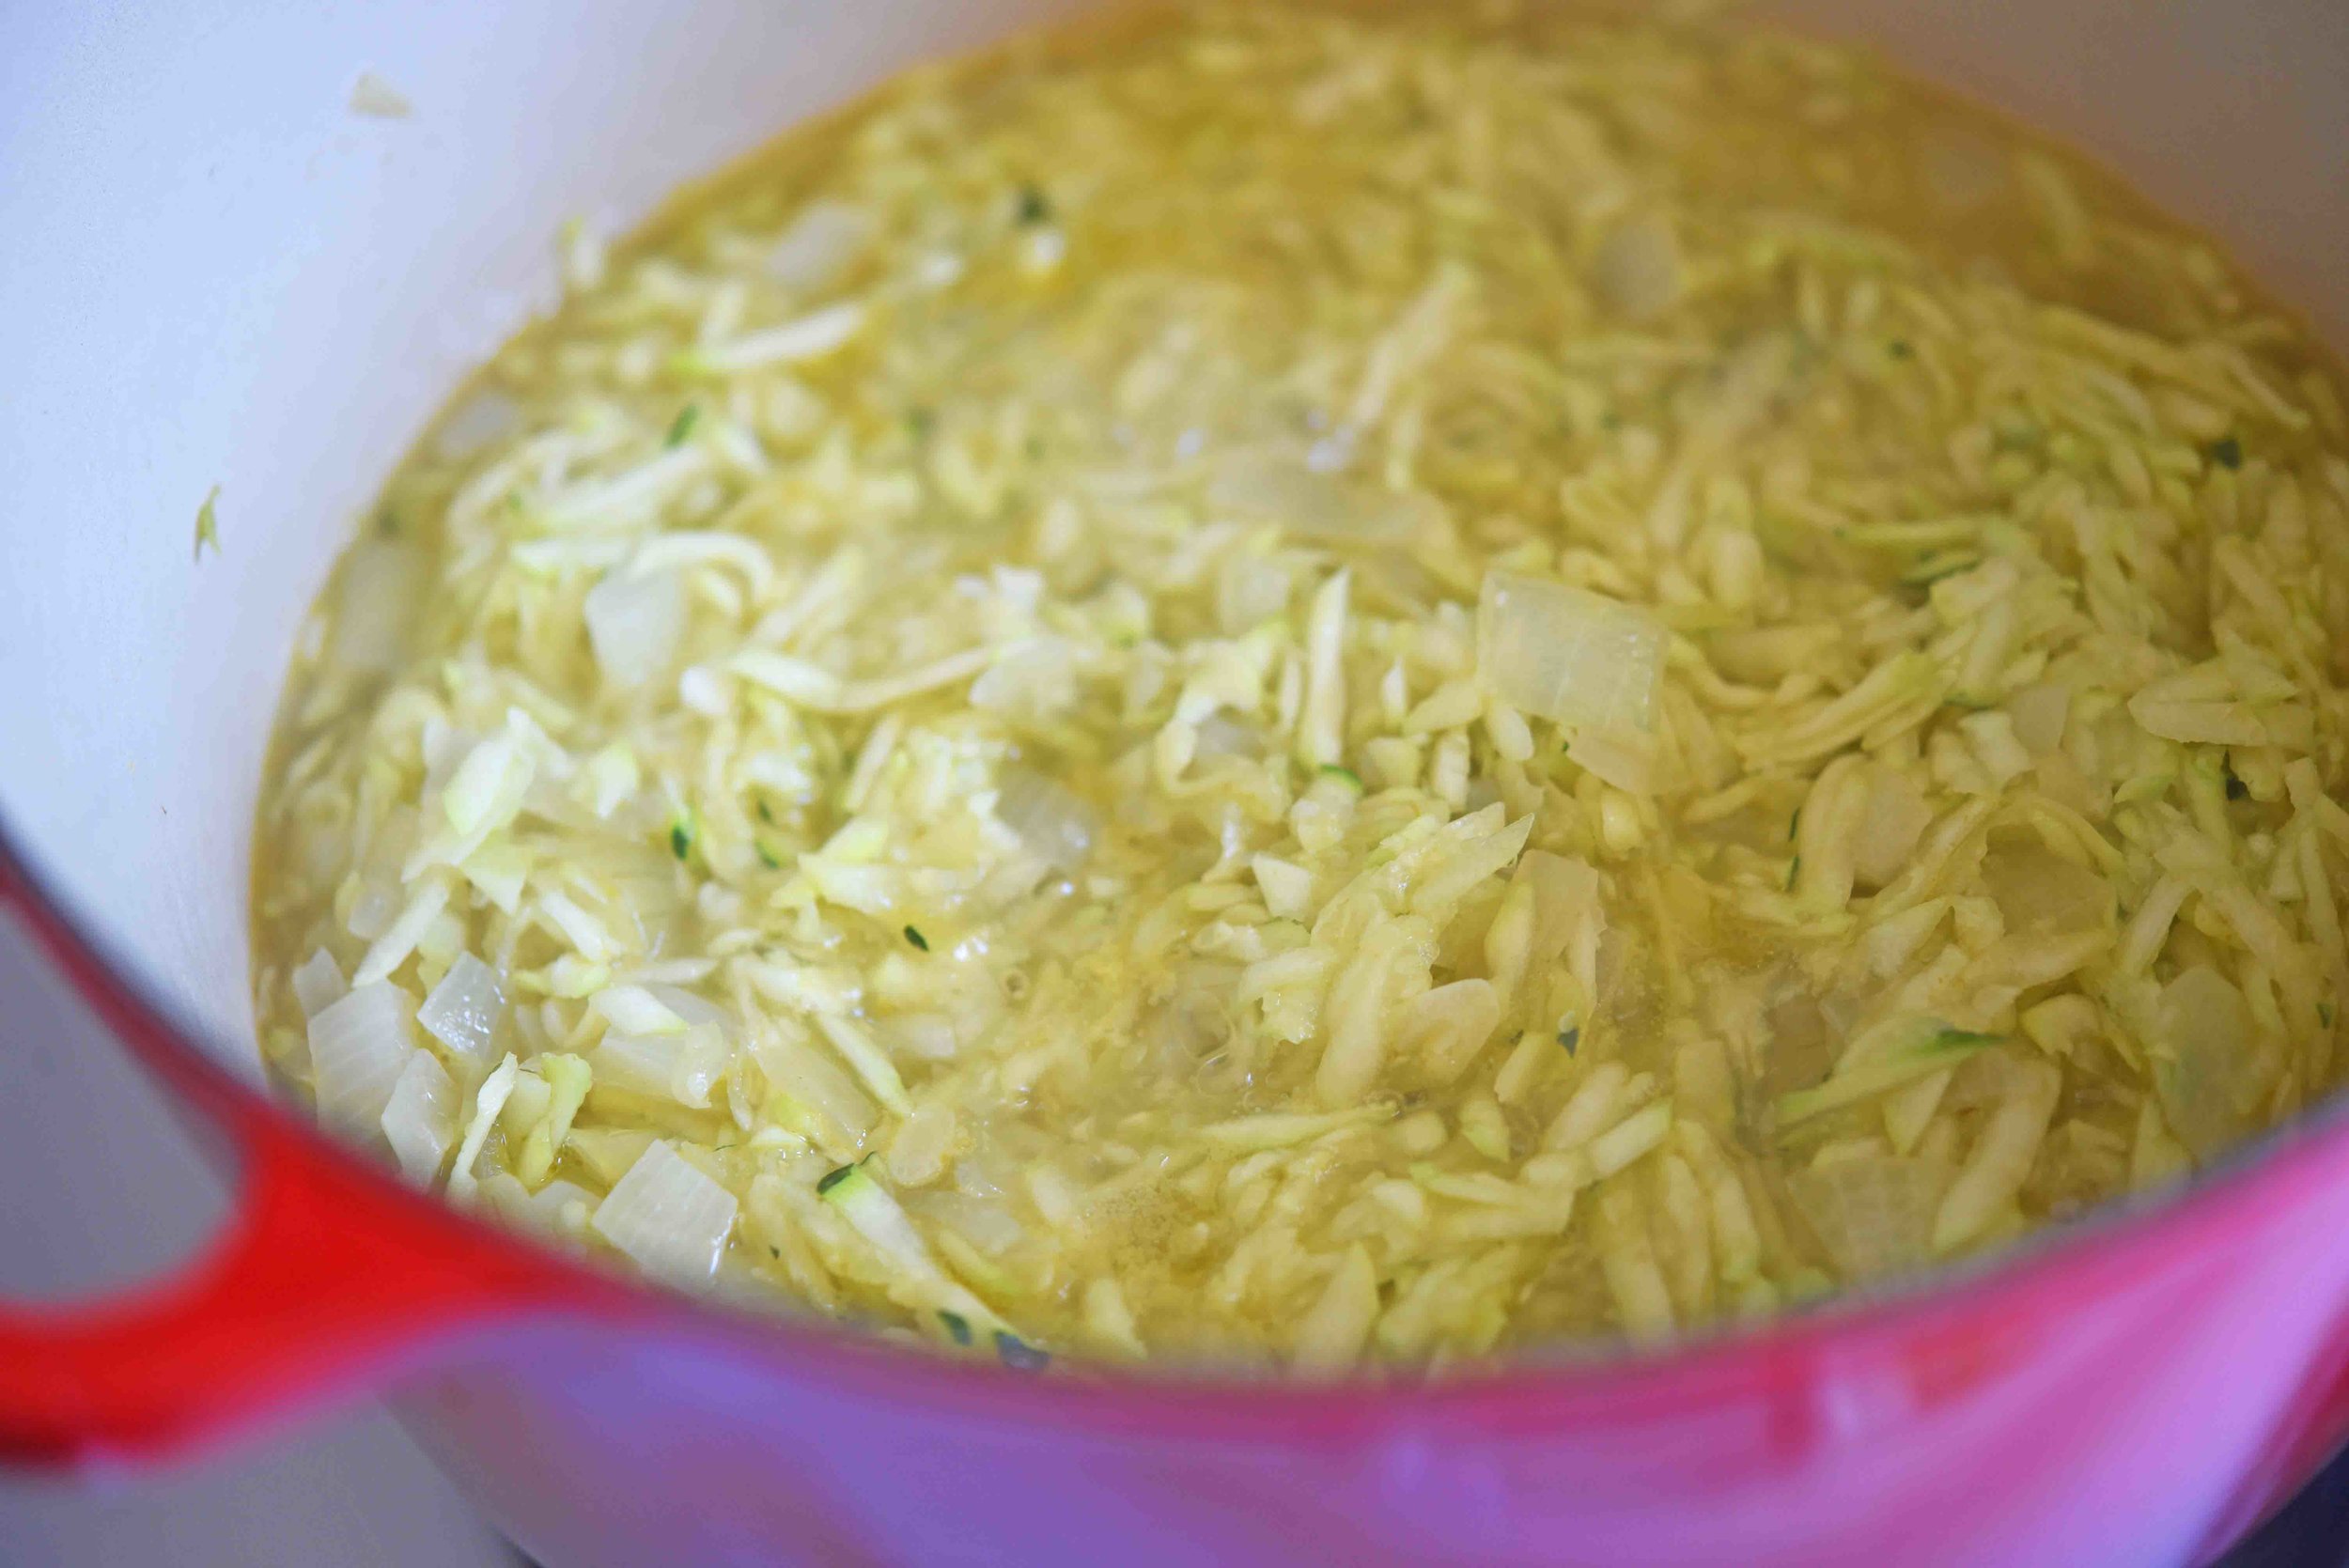
Then add some zucchini and stock…

Zucchini Soup 5(1).jpg

Puree with avocado for creaminess, and then some parm for kick…

And that’s it!

Zucchini Soup 6(1).jpg

It’s silky and light, but still totally satisfying.

If your kids don’t gobble it right up, you’ll have no problem eating all the leftovers!

And when the leftovers are gone, just remember how easy it was to prepare everything and get it on the stove!

Zucchini Soup 7(1).jpg

Zucchini Soup

servings: 2; makes 3 cups

Ingredients:

  • 1 tablespoon olive oil
  • 1 medium yellow onion, roughly chopped
  • 2 garlic cloves, thinly sliced
  • 3 medium zucchini (about 1½ pounds total), peeled + grated, with peels reserved for a garnish
  • 1 cup chicken or vegetable stock
  • ½ medium avocado
  • 1 tablespoon grated parmesan cheese
  • 1¼ teaspoons kosher salt
  • 1 teaspoon finely chopped fresh thyme leaves

Directions:

  1. Heat the olive oil in a large pot over medium heat, then add the onion and garlic and cook them until they are softened but not brown—3 to 5 minutes.
  2. Add the grated zucchini and stock, then bring the mixture to a simmer and cook covered until the zucchini is very soft—about 10 minutes, stirring occasionally.
  3. Meanwhile, cut the avocado in half and remove the pit. Use a soupspoon to scoop the flesh into a blender. Then add the cooked zucchini mixture to the blender and puree its contents until smooth.
  4. Transfer the soup back to the pot and add the parmesan, salt, and thyme, cooking over medium-high until the soup is heated through, about 3-5 minutes.
  5. Serve by dividing the soup into two bowls and garnishing each with the reserved zucchini peels. If you desire, you can also garnish the soup with ground black pepper or additional parmesan cheese.
: @NikkiDinki

: @NikkiDinkiCooking
Zucchini Soup 8(1).jpg
 

Find more recipes like this in MORE VEGGIES PLEASE!


You might also like these recipes:

Sriracha Hot Chicken Soup

Srirach Chicken Soup.jpg

Chicken noodle soup is great and all, but if the stock you're using isn’t first class, well, the whole thing can end up tasting...just okay.

Srirach Chicken Soup 2.jpg

So for this recipe, I’m using veggies that will infuse the broth with a spicy, smoky flavor.

A flavor that will wake up your taste buds.

Srirach Chicken Soup 1.jpg

Roasted red peppers, fire roasted tomatoes, and sriracha—all things you can find in any grocery store these days!

These ingredients elevate what was once a basic soup to anything but.

Srirach Chicken Soup 3.jpg

But let’s be honest, I hooked you as soon as I said Sriracha Hot Chicken Soup. 😉

Sriracha Hot Chicken Soup

servings: 6

Ingredients:

  • 2 tablespoons olive oil
  • 2 to 3 celery ribs, chopped (about 1 cup)
  • 1 small yellow onion, chopped (about 1 cup)
  • 2 medium carrots, chopped (about 1 cup)
  • 3 garlic cloves, minced
  • 2 teaspoons kosher salt
  • Two 12-ounce jars roasted red peppers (about 4 small peppers)
  • Two 32-ounce boxes chicken or vegetable stock (8 cups)
  • One 14-ounce can diced fire-roasted tomatoes with green chilis
  • 1 to 2 tablespoons sriracha
  • 12 ounces wide egg noodles
  • 2 cups cooked shredded chicken
  • Juice of 1 lime
  • 2 tablespoons chopped parsley leaves, more for garnish
  • 1 avocado, pit + skin removed, chopped

Directions:

  1. Heat the oil in a large pot over medium heat, then add the celery, onions, carrots, garlic and 1 teaspoon of the salt. Cook this mixture until it is soft and fragrant—about 7 minutes.
  2. While the veggies cook, drain the roasted red peppers, then prepare by pureeing them in a food processor or blender, or finely chopping by hand.
  3. To the pot with the veggies, add the stock, pureed roasted peppers, tomatoes, sriracha (use 1 to 2 tablespoons, depending on how spicy you like things), and remaining 1 teaspoon of salt. Bring this mixture to a simmer, then cook to allow the flavors to combine—about 5 minutes.
  4. Add the egg noodles and cook until they are a couple of minutes short of al dente—about 5 minutes. Add the cooked chicken, lime juice, and parsley, then cook until the chicken is warmed through—about 3 to 5 minutes. Taste the soup and add salt if needed.
  5. To serve, top with the additional parsley along with the avocado. Enjoy with grilled bread if desired.
: @NikkiDinki

: @NikkiDinkiCooking
Srirach Chicken Soup 4.jpg

Find more recipes like this in MORE VEGGIES PLEASE!


You might also like these recipes:

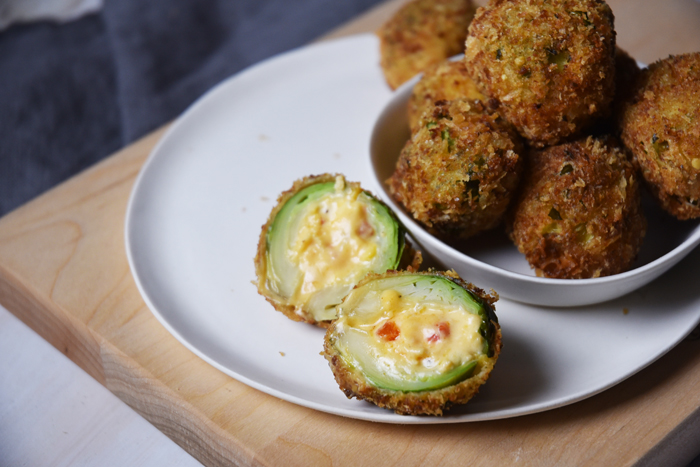
Brussels Sprout Poppers


Super Bowl Sunday is just around the corner and this means you're about to be eating all the Super Bowl snacks your little heart could desire.


It's a day to sit around, watch TV, crack open a beer, and forget about those New Year's resolutions--while enjoying all the cheesy, fried, Buffalo-flavored things you can imagine.


Read More

Christmas Green + Red Cheese Balls

Red and Green Christmas Cheeseballs_SMALL(1).jpg

I don’t think I’ve ever had a party—small or large, planned or last-minute—where I haven’t served cheese.

Christmas Cheese Balls 2.jpg

If I’m standing around, drinking wine and chatting, I want to be snacking on some sort of cheesy goodness.

Christmas Cheese Balls 4.jpg

And when it comes to Christmas, I find that my family is always in need of appetizers.

Christmas Cheese Balls 5.jpg

I love the part of holiday gatherings where everyone is just relaxing and munching...

Christmas Cheese Balls 8.jpg

So to bring some cheese to the holidays and keep things super festive at the same time, may I present you with Christmas Cheese Balls!

Christmas Cheese Balls 9.jpg

The ingredients are few and the time involved is minimal, but in the end you'll be walking in with a show-stopping appetizer!

Christmas Cheese Balls 3.jpg

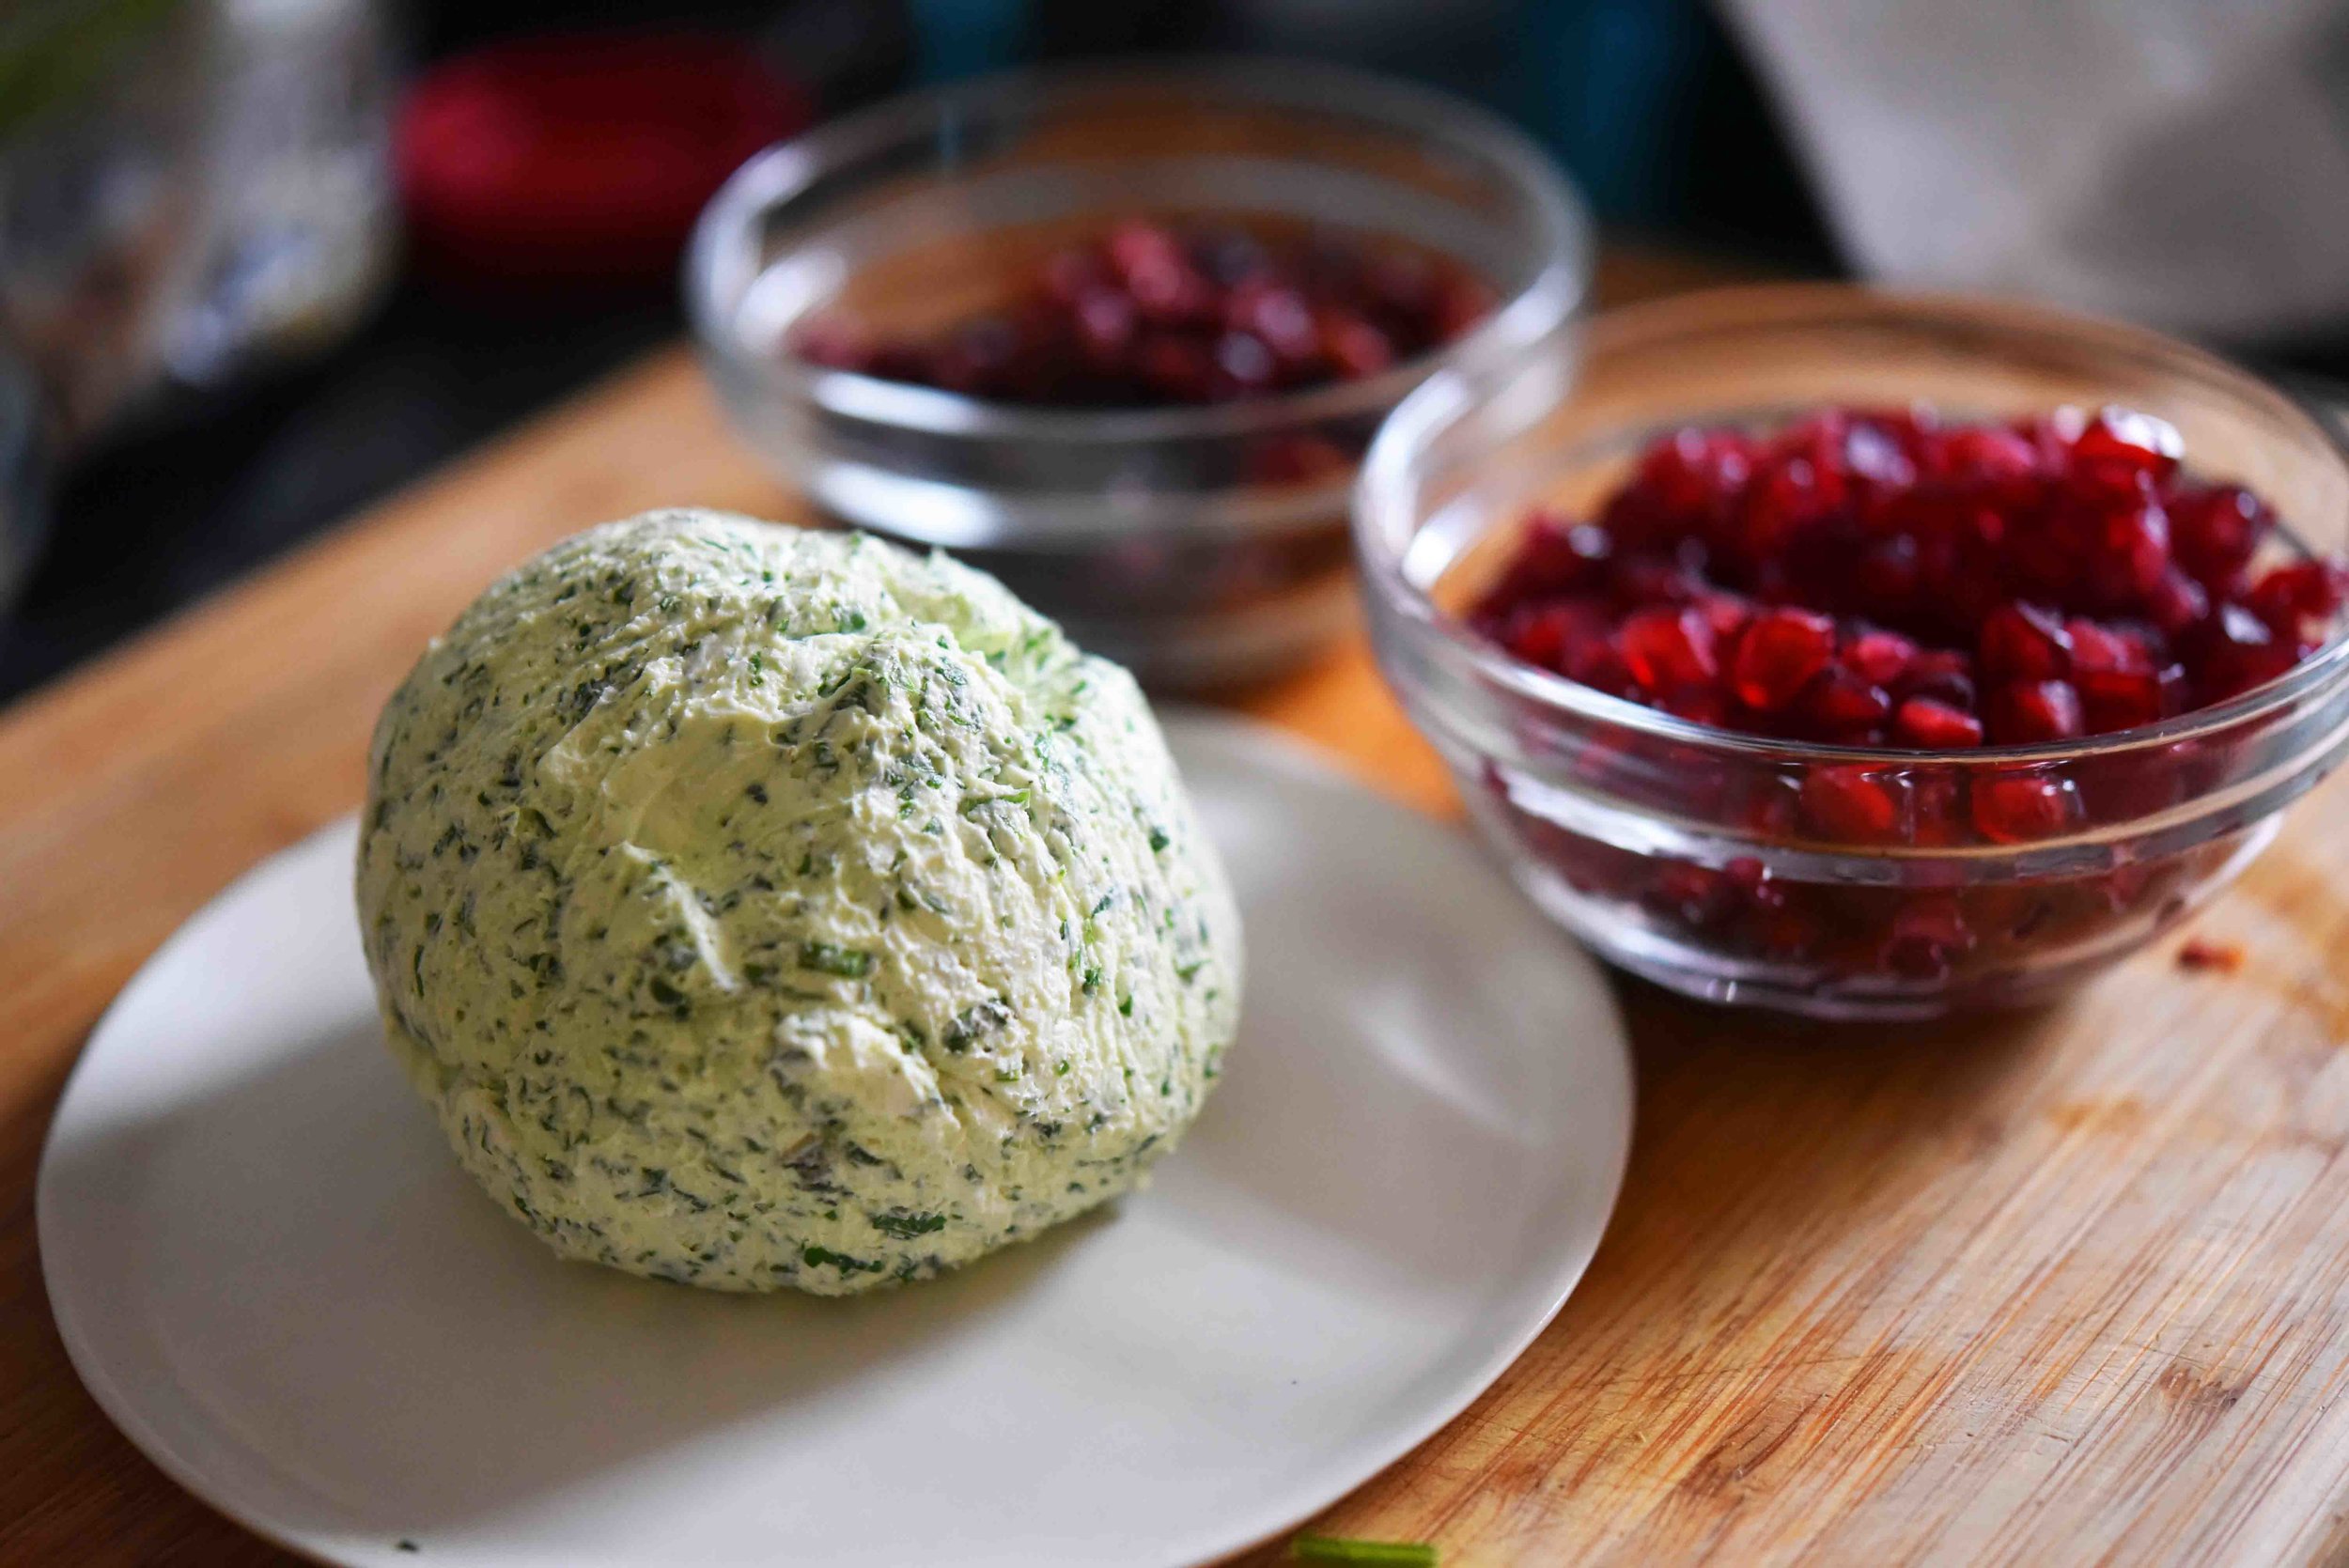
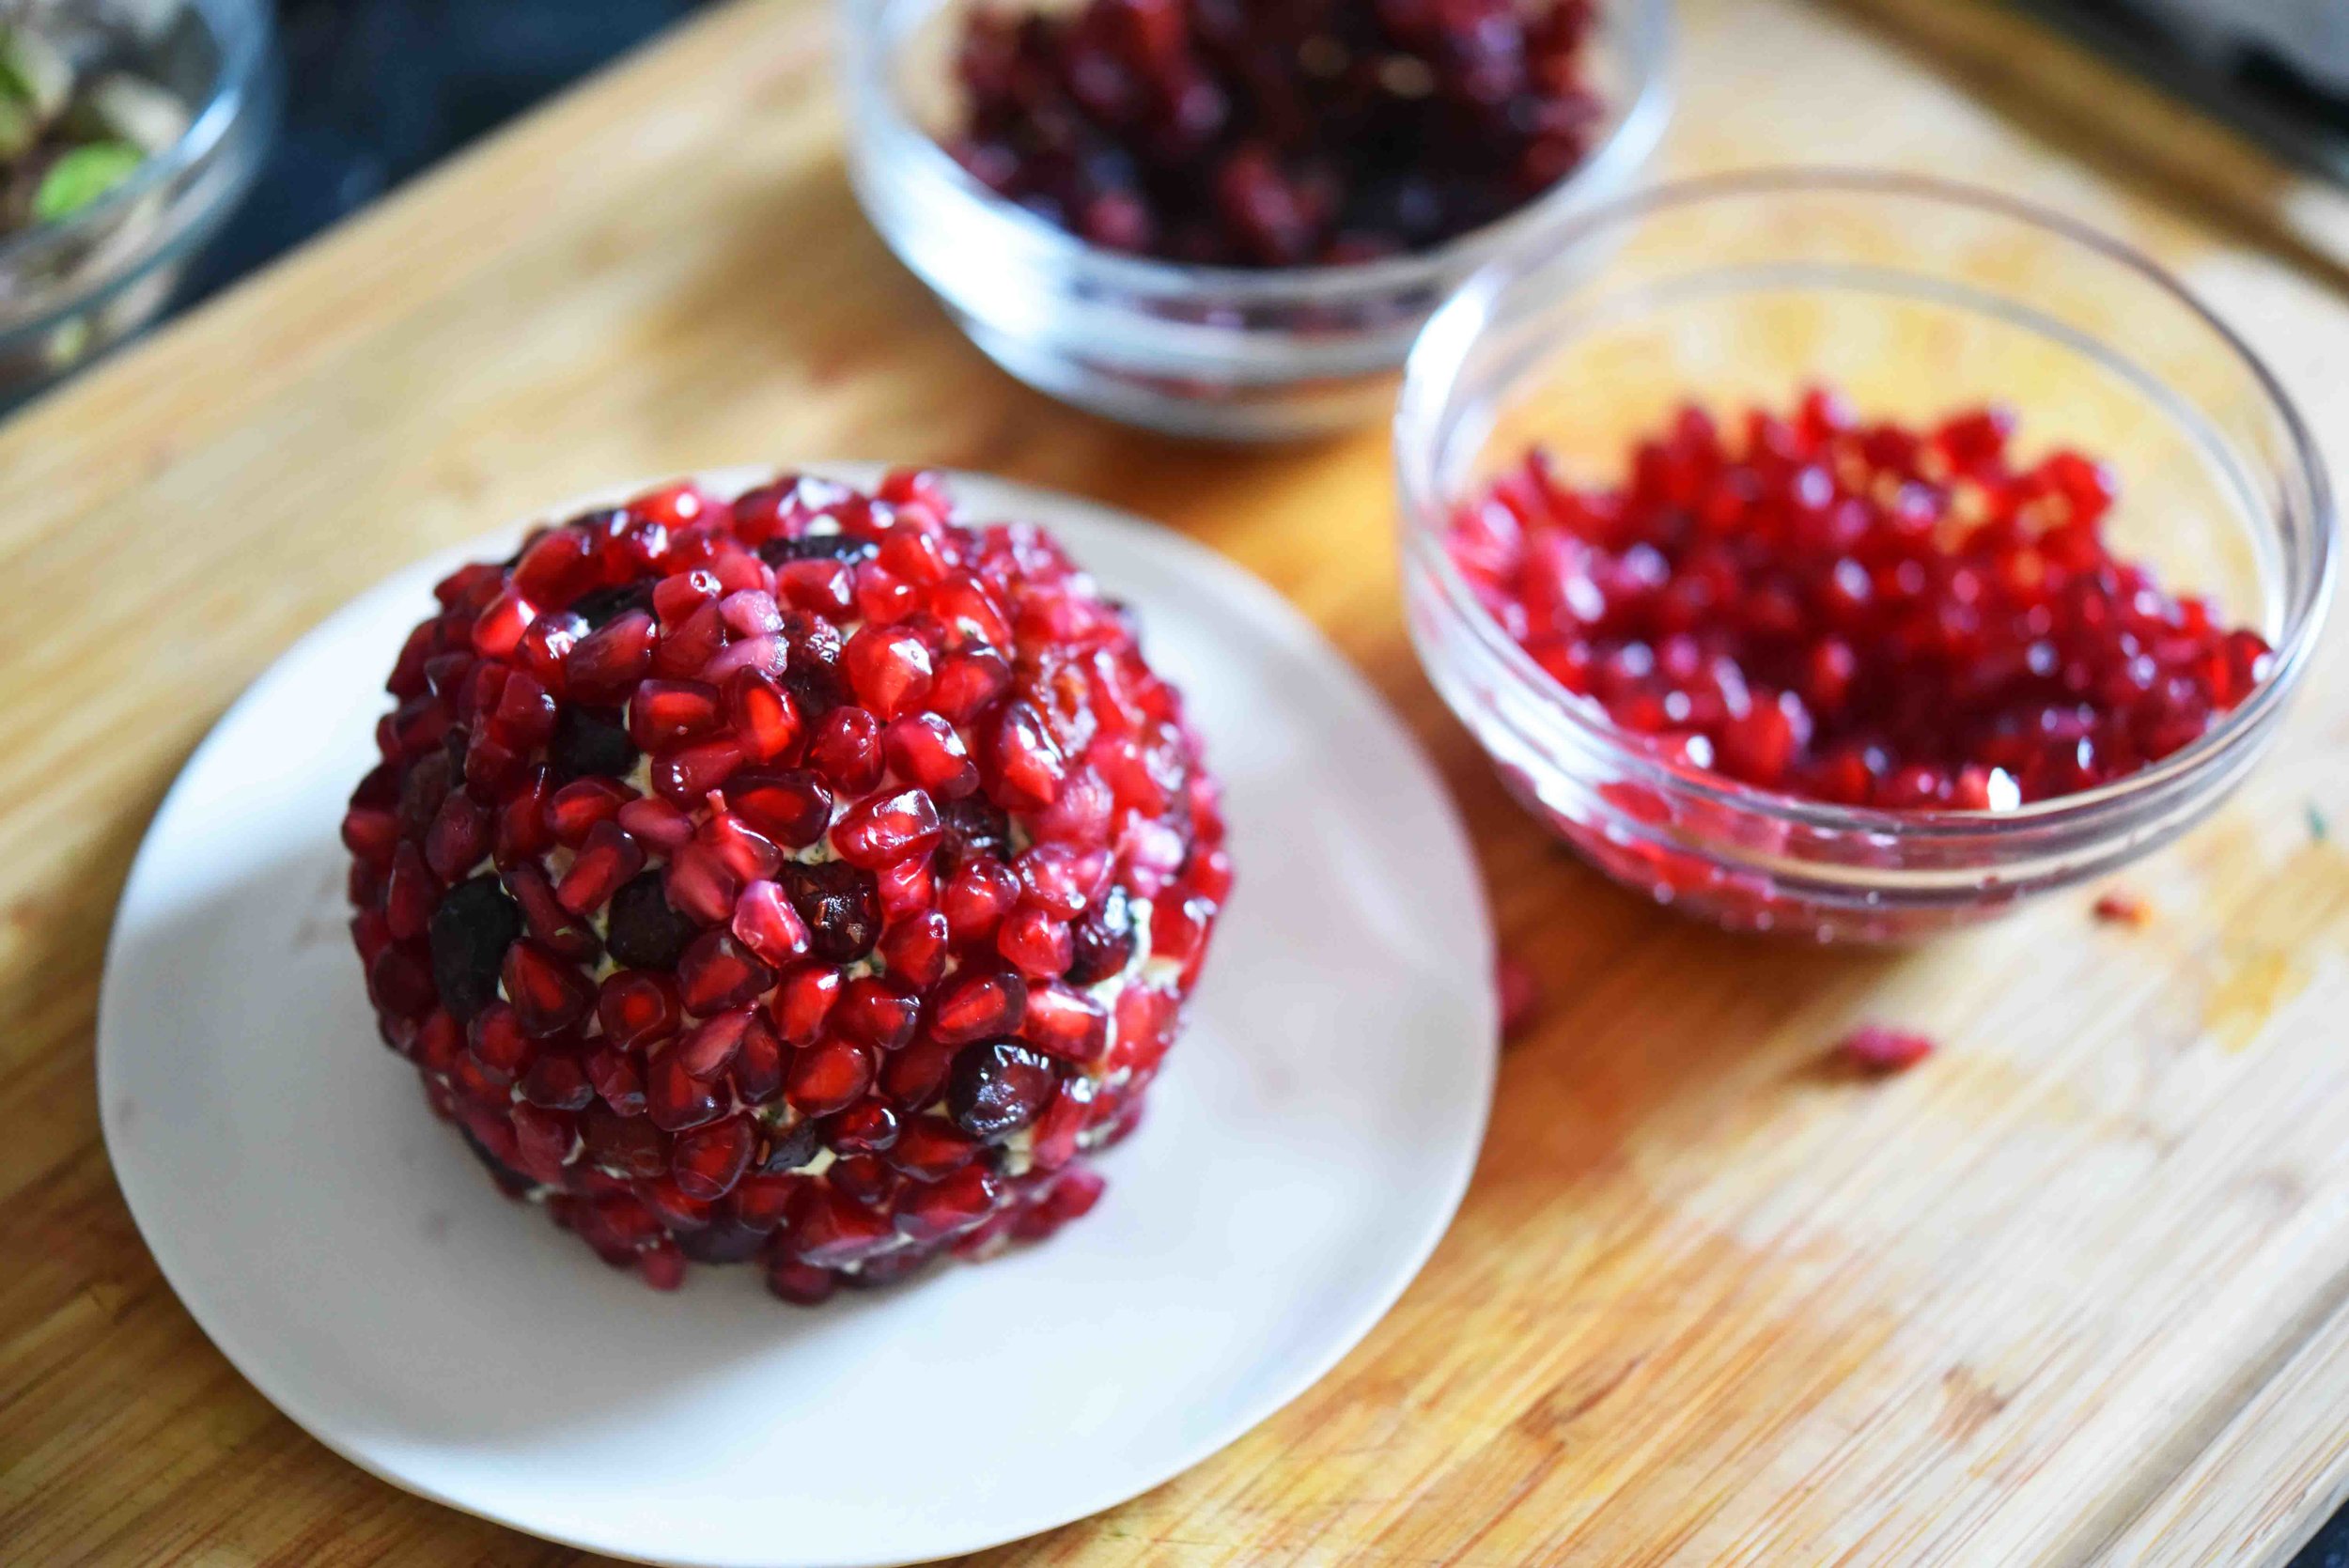
You can make just the cheese ball with the green inside and enjoy a pesto-inspired ball with a red outside of tart and crunchy pomegranates.

Christmas Cheese Balls 6.jpg

Or you can choose the ball with the red inside made with sundried tomatoes and green-coated in pistachios and herbs.

Christmas Cheese Balls 7.jpg

No matter what you do, you’ve got a cheese ball!

And with that, you’ve got a party!

Christmas Cheese Ball
(Red Outside + Green Inside)

servings: 1 cheese ball

Ingredients:

  • 4 ounces cream cheese, chilled
  • 4 ounces herbed goat cheese, chilled
  • ½ cup coarsely chopped spinach
  • ¼ cup coarsely chopped fresh basil leaves
  • ⅛ teaspoon garlic powder
  • 1 cup pomegranate seeds

Directions:

  1. Place the cream cheese, goat cheese, spinach, basil, and garlic powder in the bowl of a food processor, then process to combine until the mixture is nearly smooth and evenly green.
  2. Transfer the cheese mixture to a piece of plastic wrap. Use the plastic, along with your hands, to form the mixture into a tight ball, then place it in the refrigerator to chill until it is firm—25 to 30 minutes.
  3. Remove the cheese ball from the plastic and transfer it to a small plate. Press the pomegranate seeds around the outside of the ball to fully cover it, then reshape it as needed to form a sphere. If you are having any trouble shaping it, let it chill for longer and try shaping/decorating again.
: @NikkiDinki

: @NikkiDinkiCooking

Christmas Cheese Ball
(Green Outside + Red Inside)

servings: 1 cheese ball

Ingredients:

  • 8 ounces cream cheese, chilled
  • ½ cup coarsely chopped sundried tomatoes
  • ¼ cup coarsely chopped fresh parsley
  • ¼ cup coarsely chopped shelled pistachios


Directions:

  1. Place the cream cheese and sundried tomatoes in the bowl of a food processor, then process to combine until the mixture is nearly smooth and evenly red.
  2. Transfer the cheese mixture to a piece of plastic wrap. Use the plastic, along with your hands, to form the mixture into a tight ball, then place it in the refrigerator for 10 minutes.
  3. Remove the cheese ball from the plastic wrap and transfer it to a small plate. Press the parsley around the outside of the ball to fully cover it, then repeat with the pistachios. Reshape the cheese ball as needed to form a sphere.
  4. Serve alongside the red cheese ball and your favorite crackers!
: @NikkiDinki

: @NikkiDinkiCooking
Christmas Cheese Balls 10.jpg
 

Find more recipes like this in MORE VEGGIES PLEASE!


You might also like these recipes:

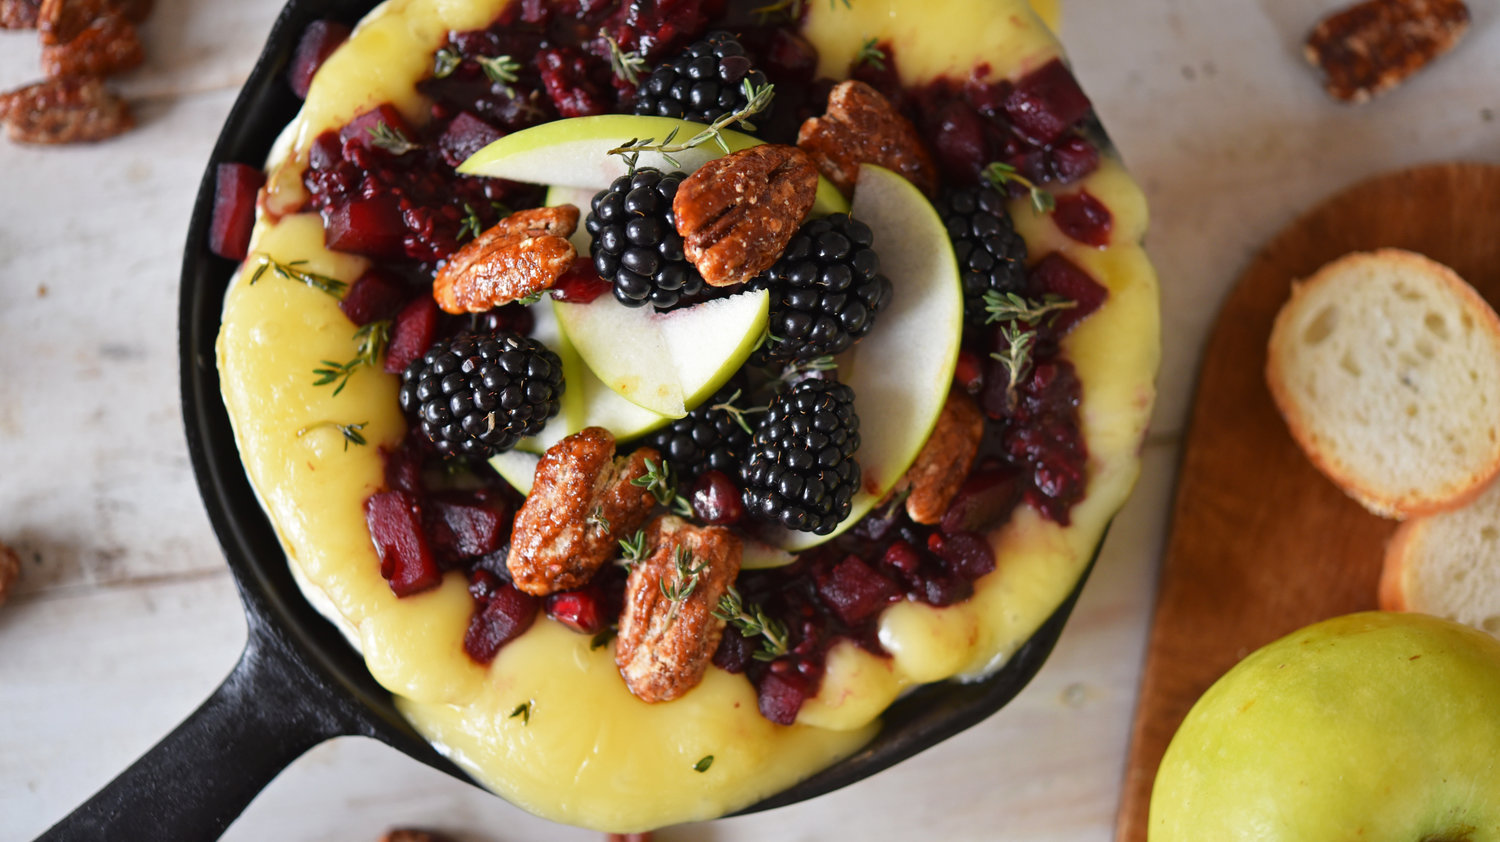
Baked Brie with Blackberry Apple Jam + Pecans

Baked Brie with Blackberry Apple Jam_SMALL(1).jpg

Appetizers are an important part of the holiday season. 

Baked Brie with Blackberry Apple Jam 2.jpg

When you're sitting around drinking bubbles and singing Christmas carols or opening presents, it's just not the same without something warm and cheesy to nibble on.

Baked Brie with Blackberry Apple Jam 3.jpg

Brie is not the most loved cheese (there are people who find it slightly stinky)...

But when you bake it into an ooey-gooey mess, you'll be hard-pressed to find someone who can resist a taste (or two, or three—or eleven).

Baked Brie with Blackberry Apple Jam 4.jpg

And it only gets better when you top it with homemade blackberry and apple jam, candied pecans, and pomegranate seeds!

Baked Brie with Blackberry Apple Jam 5.jpg

Because although we can all agree that melty cheese is ridiculously good, when you combine it with slightly tart jam and crunchy pecans, you will NEED a second, third—and eleventh!—helping!

Baked Brie with Blackberry Apple Jam 6.jpg

And let’s be honest, it’s darn cute.

It’s a present in itself!

Baked Brie with Blackberry Apple Jam 7.jpg

Baked Brie with Blackberry Apple Jam

servings: 1 brie wheel with about 1¾ cups jam, serves 8 to 10

Blackberry Apple Jam:

  • 2 cups blackberries, halved
  • 2 medium green apples, peeled + chopped into ½-inch dice
  • 2 tablespoons maple syrup
  • 2 tablespoons balsamic vinegar

Baked Brie:

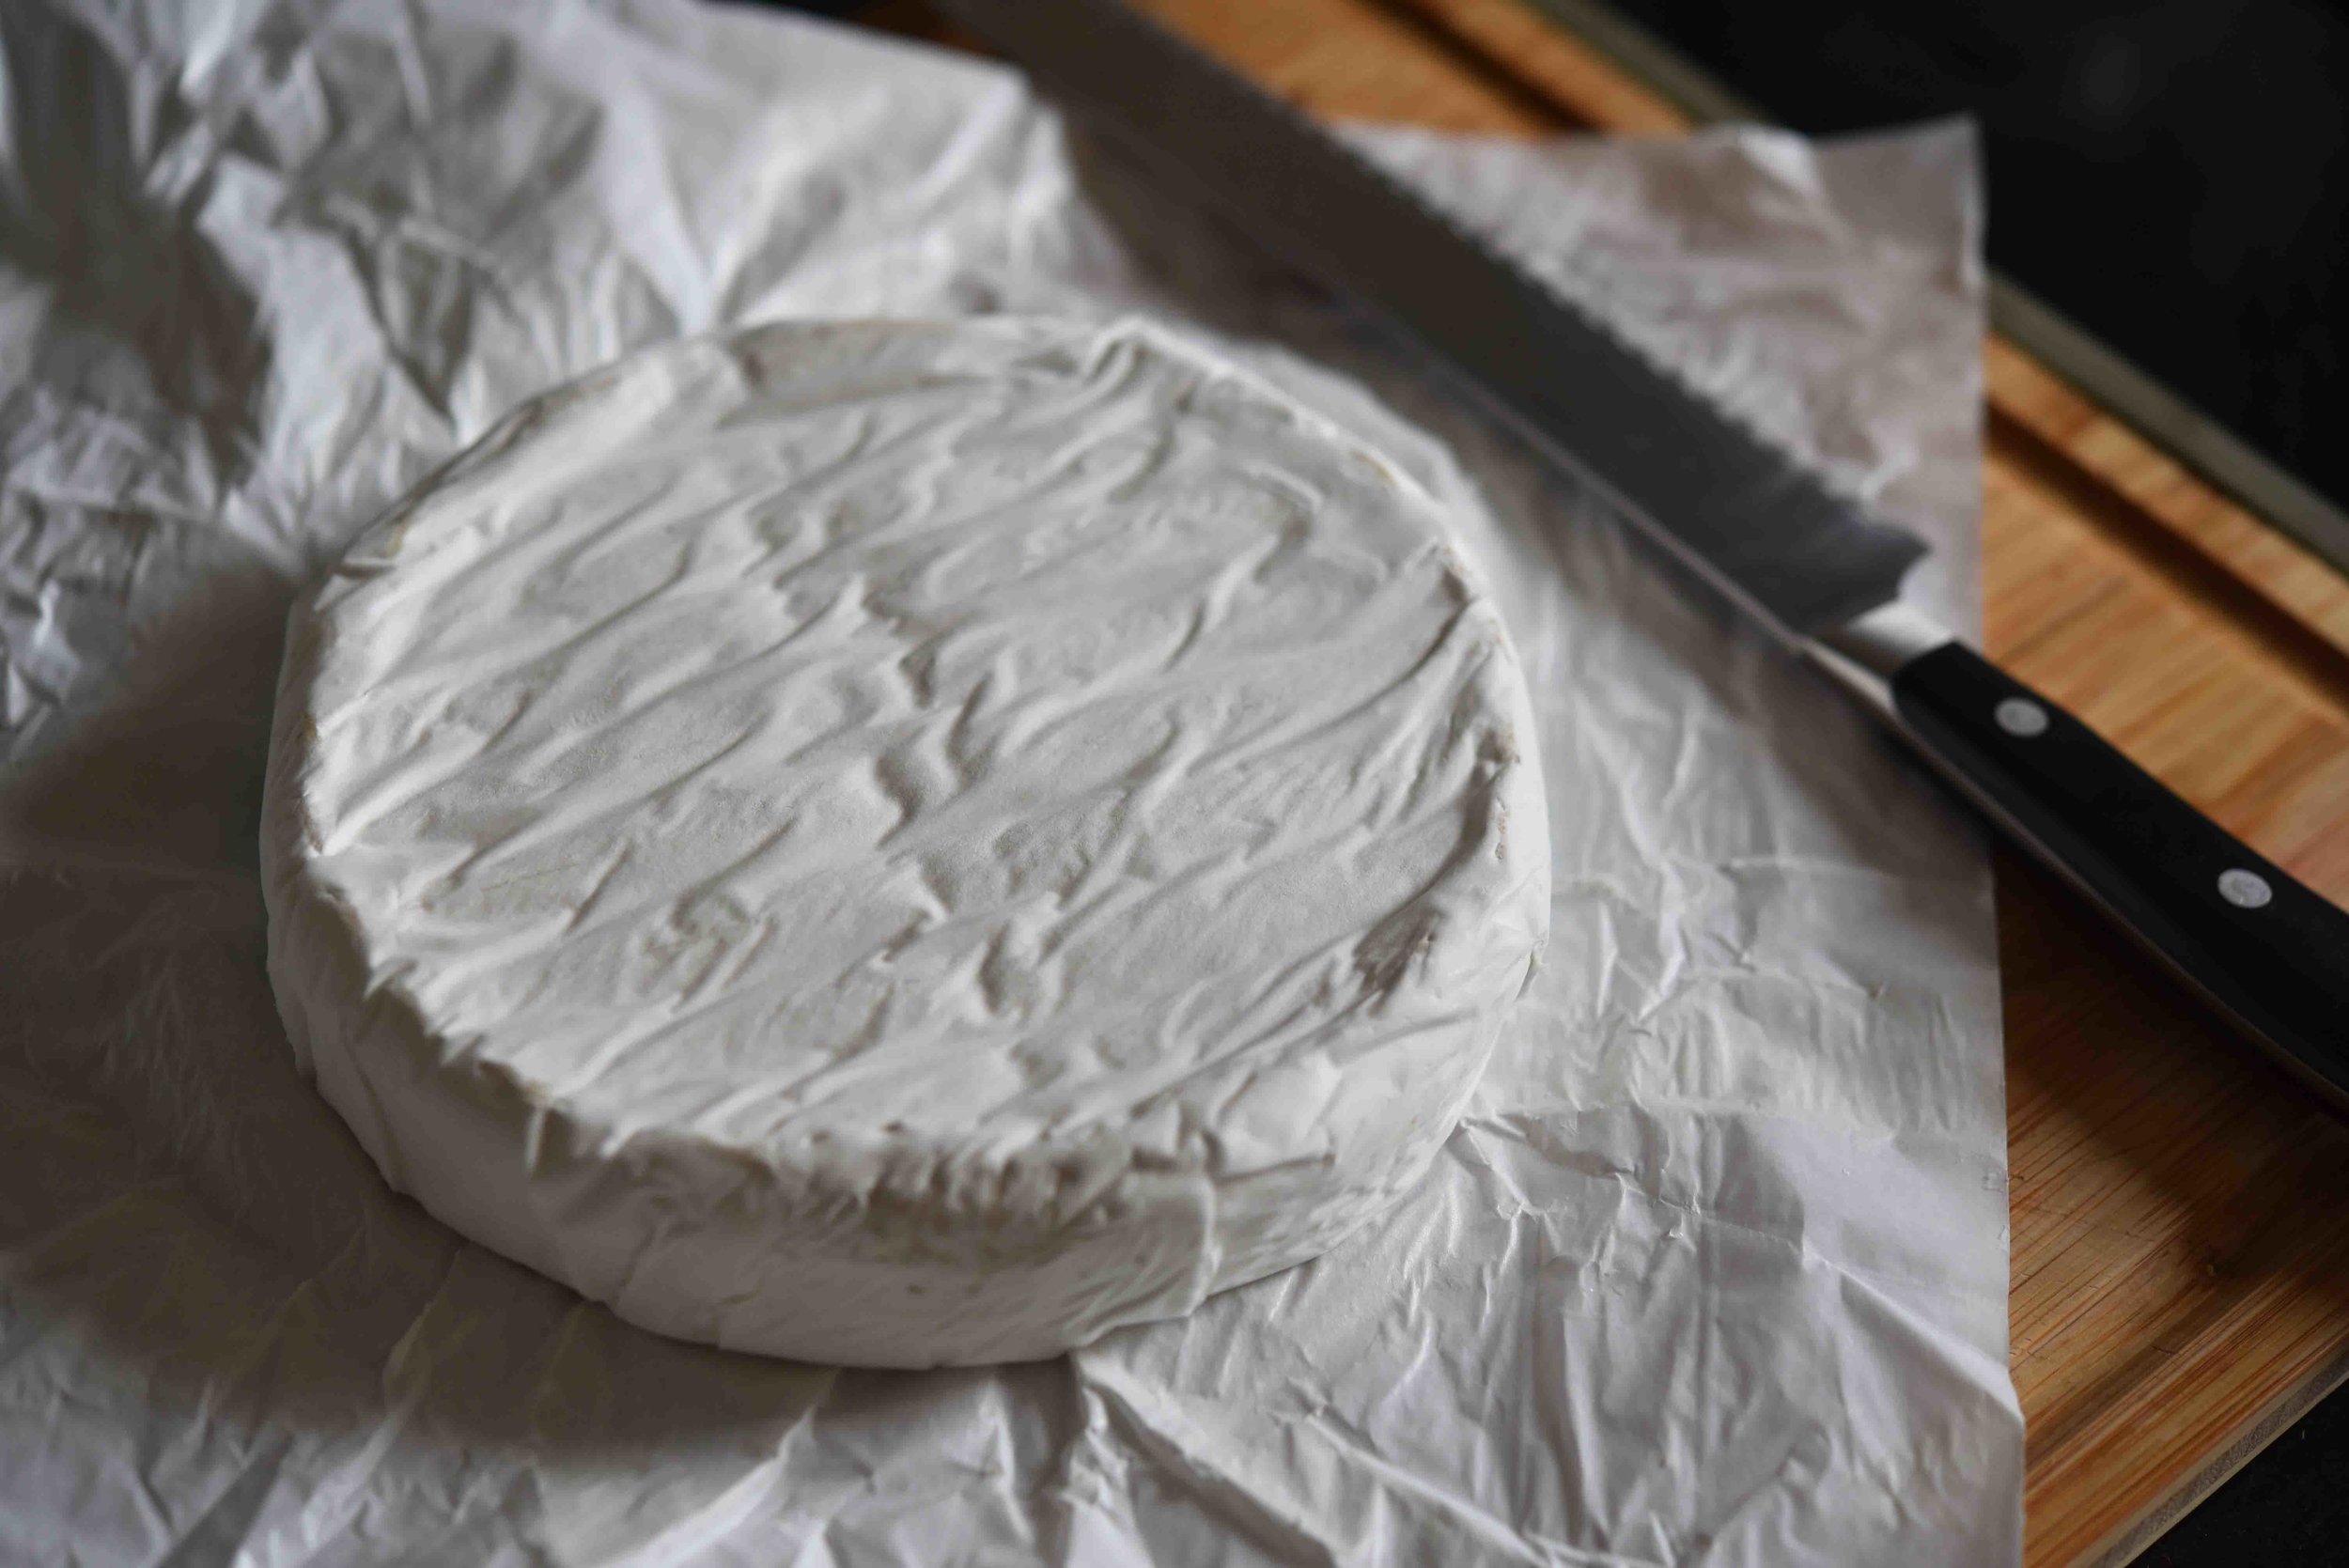
  • 1 brie cheese wheel (16 ounces), rind on
  • 1½ cups Blackberry Apple Jam
  • ½ cup whole blackberries
  • 1 medium green apple, sliced
  • ¼ cup coarsely chopped candied pecans
  • 2 tablespoons pomegranate seeds
  • 1 tablespoon fresh thyme leaves

Blackberry Apple Jam:

  1. In medium saucepan over medium-high heat, combine the blackberries, apples, maple syrup, and vinegar. Bring this mixture to a boil, then a simmer, stirring occasionally, until all of the fruit is purple and has broken down; the liquid should be absorbed and the mixture thick and jam-like—10 to 15 minutes.

Baked Brie:

  1. Preheat the oven to 375°F. Cut the top rind off the brie wheel and discard it. Place the brie wheel in a small, round, oven-proof dish, then place the dish on a baking sheet and cook until the cheese is melty—10 to 12 minutes.
  2. Remove the baked brie from the oven and top it with the Blackberry Apple Jam, blackberries, apple slices, pecans, pomegranate seeds, and thyme leaves.

Notes:

  • As the brie is eaten, there will be less jam at the bottom. Feel free to add the remaining ¼ cup of jam (the amount remaining after putting the 1½ cups of jam on top of the baked brie) to the bottom bit of the brie to increase the jam-to-brie ratio.
: @NikkiDinki

: @NikkiDinkiCooking
Baked Brie with Blackberry Apple Jam 8.jpg
 

Find more recipes like this in MORE VEGGIES PLEASE!


You might also like these recipes:

Sausage Stuffing Stuffed Brussels Sprouts


My family is big on Brussels sprouts for Thanksgiving (along with a laundry list of other must-haves, we like to eat).


So as the one normally in charge of anything veggie, I often find myself elbow deep in Brussels sprouts come November.


Read More

Jack-O-Lantern Peppers with Onion + Dill Veggie Dip

Jack-o-Lantern Veggie Dip Bell Peppers_SMALL(1).jpg

I love to have people over for appetizers…

Jack-o-Lantern Veggie Dip Bell Peppers 1.jpg

I love to pick at snacks and sip my drink, and pick and drink...

Jack-o-Lantern Veggie Dip Bell Peppers 2.jpg

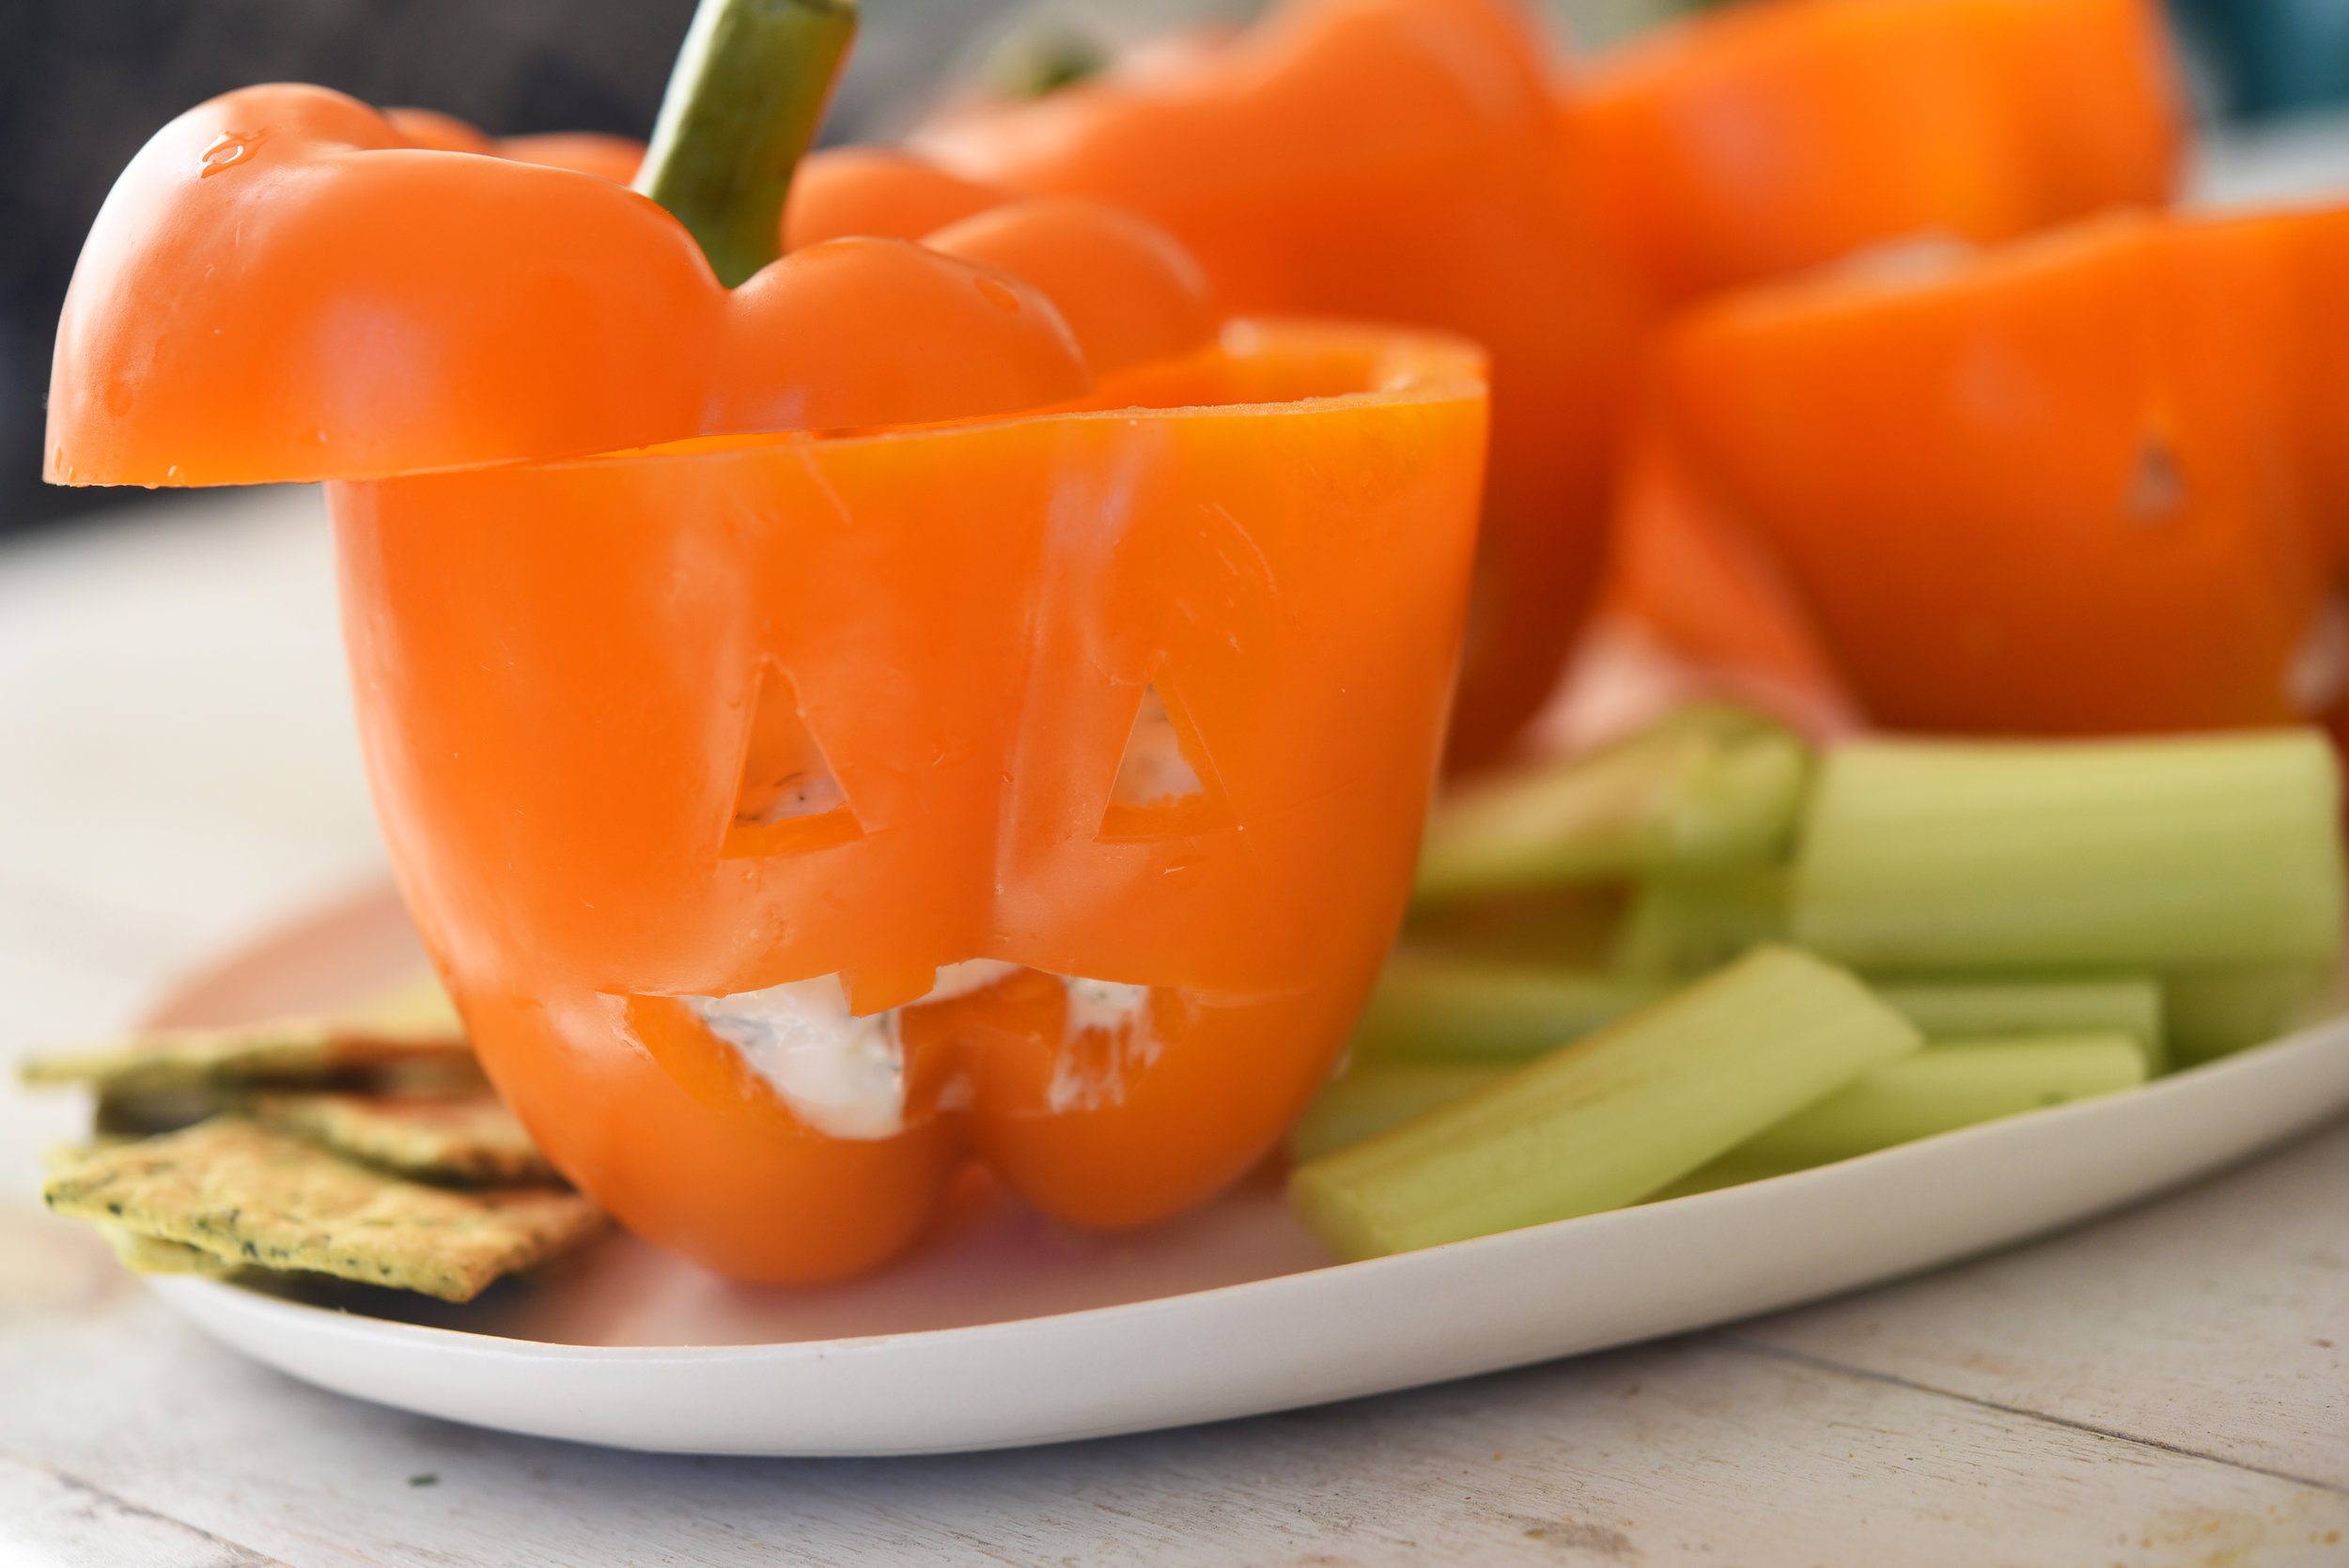
And these pepper pumpkins are great for keeping it simple—and festive—whenever guests drop by!

Jack-o-Lantern Veggie Dip Bell Peppers 3.jpg

They're easy and oh-so-cute, and when you fill them with a homemade veggie dip, they make the perfect fall appetizers. 

Jack-o-Lantern Veggie Dip Bell Peppers 4.jpg

Just cut jack-o-lantern faces into orange peppers and fill them with a combo of Greek yogurt, mayo, dill, garlic, and sundried tomatoes.

Jack-o-Lantern Veggie Dip Bell Peppers 5.jpg

And when the dip is gone, you can just devour these little pumpkins, too.

Voila! Suddenly you have no dishes!

And that is what really makes for a great party. 

Jack-o-Lantern Veggie Dip Bell Peppers 6.jpg

Jack-O-Lantern Peppers with Onion + Dill Veggie Dip

servings: 4 peppers with 2 cups dip

Ingredients:

  • 1¼ cups plain Greek yogurt
  • ½ cup mayonnaise
  • ½ cup packed coarsely chopped fresh dill
  • ¼ cup coarsely chopped fresh scallions
  • ¼ cup coarsely chopped sundried tomatoes
  • 1 tablespoon dried onion flakes
  • 1 teaspoon Worcestershire sauce
  • ½ teaspoon garlic powder
  • ½ teaspoon kosher salt
  • 4 medium orange bell peppers with flat bottoms + intact stems

Directions:

  1. In a medium bowl, combine the yogurt, mayonnaise, dill, scallions, tomatoes, onion flakes, Worcestershire sauce, garlic powder, and salt, then set aside.
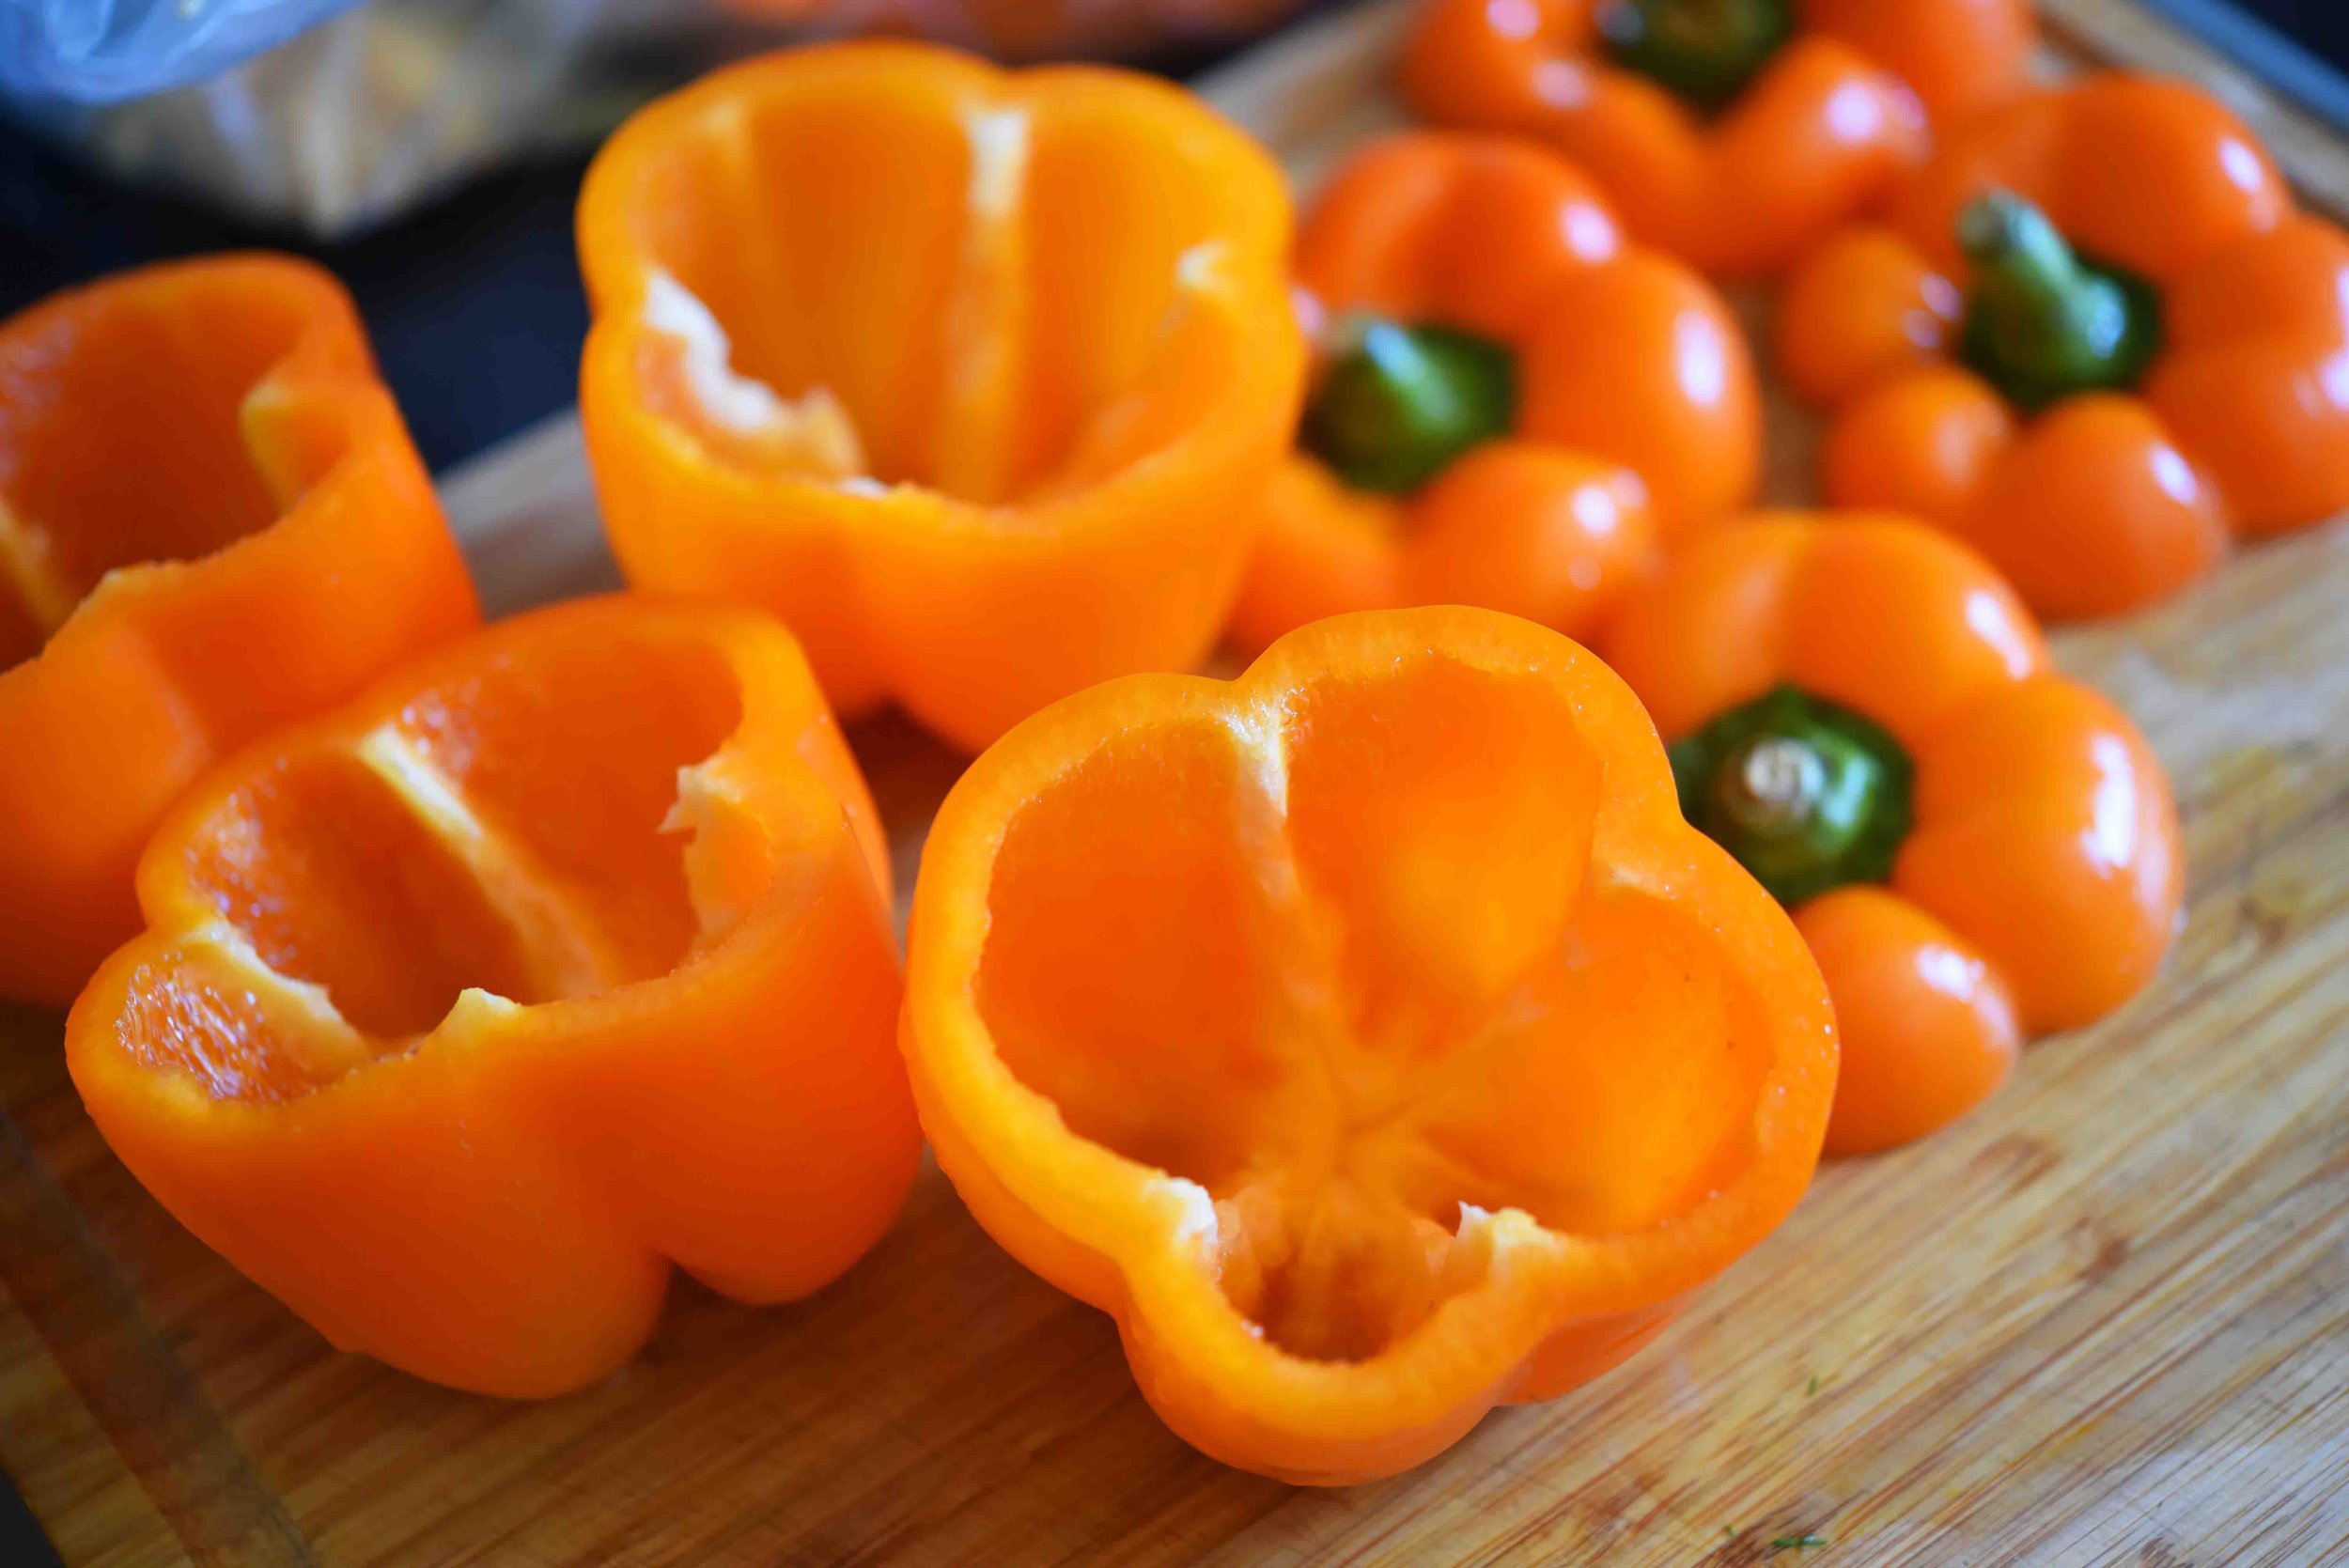
  2. Cut straight across the tops of the peppers, then set the tops aside. Scoop out and discard the pepper seeds.
  3. Using a small, sharp paring knife, cut jack-o-lantern faces out of each pepper (such as triangle eyes and a smile with teeth).
  4. Scoop ¼ of the veggie dip (about ½ cup) into each pepper, then replace the tops.
  5. Serve with your favorite crudité platter, veggies, or crackers.

Notes:

  • The dip is best when it sits for at least 30 minutes; make it ahead of time, if possible.
: @NikkiDinki

: @NikkiDinkiCooking
 

Find more recipes like this in MORE VEGGIES PLEASE!


You might also like these recipes:

Carrot Pumpkins

Carrot Pumpkins_SMALL(1).jpg

I like to celebrate Halloween as much as the next person, but I’m not the type to spend hours crafting or piping pumpkins onto everything I make.

Carrot Pumpkins 1.jpg

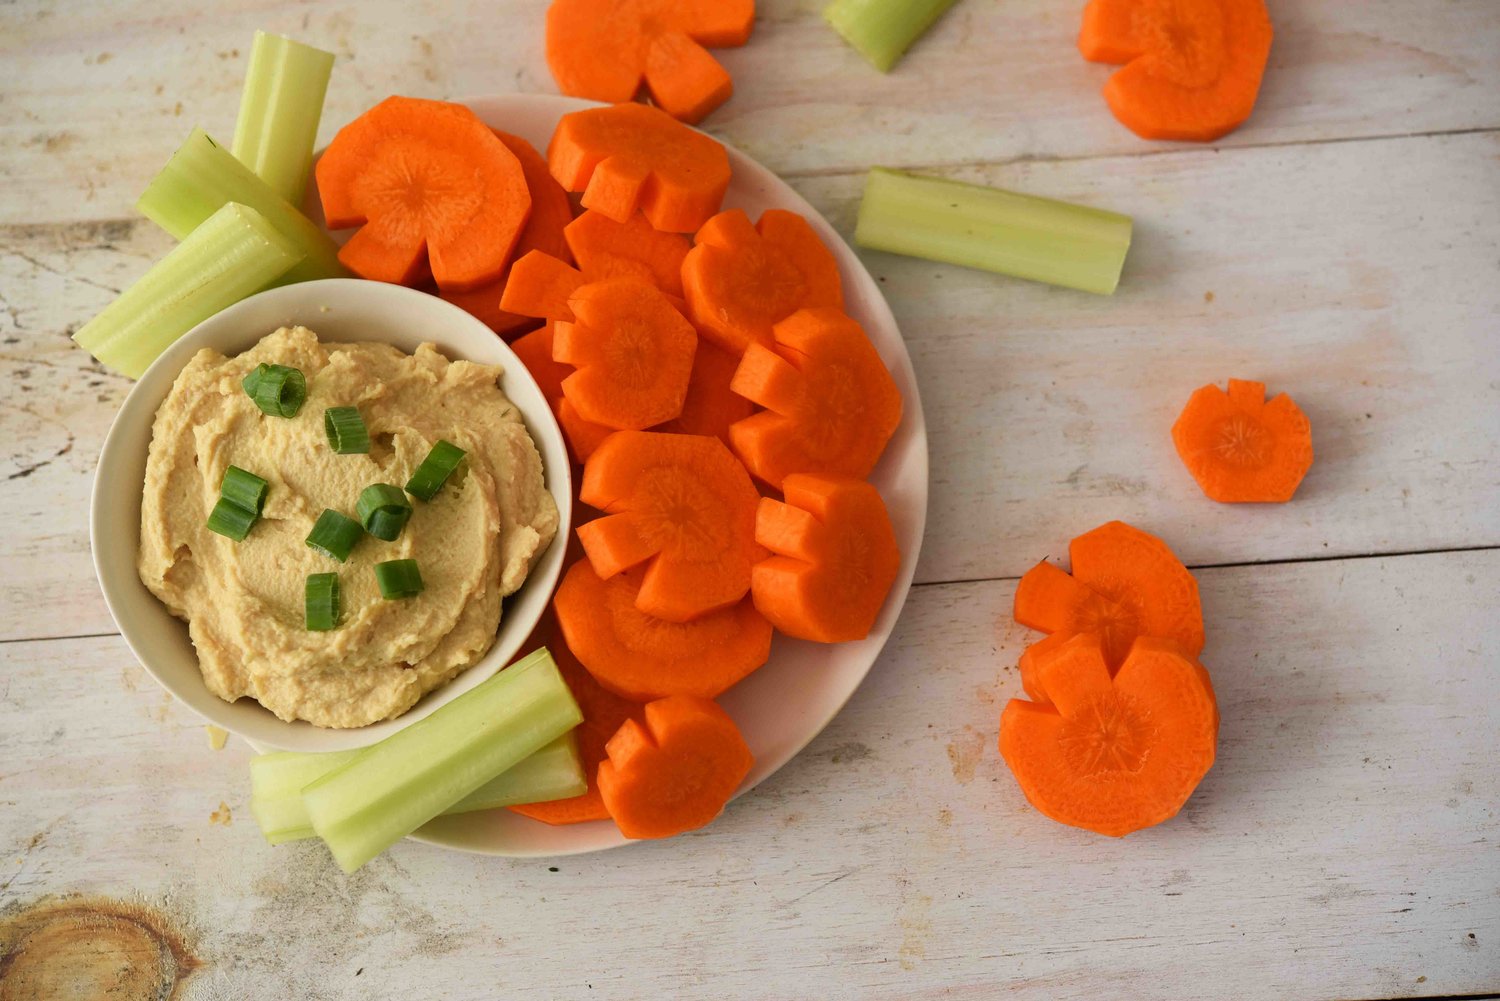
But what I do love is to take a carrot, make a couple of simple cuts in it, and suddenly have a pumpkin patch on my plate!

Carrot Pumpkins 2.jpg

These pumpkin carrots could not be simpler!

Carrot Pumpkins 3.jpg

Look for thick carrots, then cut two “V”’s lengthwise down the tops of the sides.

Carrot Pumpkins 4.jpg

Cut the carrots into rounds, then let yourself feel like one of those Pinterest moms as your kids go to school with NO BORING CARROTS in their lunches.

They've got PUMPKIN carrots!

Carrot Pumpkins 5.jpg

Carrot Pumpkins

servings: 1 cup

Ingredients:

  • 2 medium carrots

Directions:

  1. Peel the carrots and cut off their tops. Place the carrots on a cutting board and cut two short vertical lines into the tops of each carrot, about ¼ inch from one another; the cuts should go about ⅓ of the way through the carrots’ diameters and should extend the length of the carrots (see cross section of carrot below).
  2. Next make two diagonal cuts into the tops of the carrots that intersect the first two cuts, creating long, triangle-shaped strips that, when removed, create pumpkin shapes when you look at cross-sections of the carrots (see below).
  3. If needed, use a vegetable peeler to refine the shapes of the carrots so that they look more like pumpkins. Cut each carrot width-wise into ¼-inch slices, discarding the smallest ends.
  4. Serve with your favorite hummus or veggie dip and enjoy!
: @NikkiDinki

: @NikkiDinkiCooking
Carrot Pumpkins 6.jpg
 

Find more recipes like this in MORE VEGGIES PLEASE!


You might also like these recipes:

Charred Tomato Garlic Bread

Charred Tomato Garlic Bread small.jpg

I love bread.

And by that, I mean:

I. LOVE. BREAD.

Charred Tomato Garlic Bread 1.jpg

And if you have a fresh loaf of bread, according to me (or you!), of course it’s good all on it’s own.

But let me tell you how it gets even better...

Charred Tomato Garlic Bread 2.jpg

It's so simple to char the bread in a grill pan with a little olive oil—on high heat.

It will get mouth-wateringly crusty on the outside, while still remaining soft and chewy on the inside.

Charred Tomato Garlic Bread 3.jpg

And when it’s crisp and browned, take it off of the grill pan and rub it with cut garlic and tomato.

This infuses those flavors ever-so-delicately—and just so incredibly perfectly!—into the bread.

Charred Tomato Garlic Bread 4.jpg

Sprinkle this amazing bread with salt and another drizzle of olive oil, and you have definitely transported that fresh loaf of bread to a whole new level.

Charred Tomato Garlic Bread 5.jpg

Charred Tomato Garlic Bread

servings: 4 to 6

Ingredients:

  • One 8 X 5-inch loaf ciabatta bread (or other crusty bread)
  • 2 tablespoons olive oil, more for drizzling
  • 1 garlic clove, halved
  • 1 medium tomato, halved
  • ¼ teaspoon kosher salt

Directions:

  1. Heat a grill pan over high heat. Cut the loaf of bread in half length-wise and drizzle all sides of it with the olive oil. Place the bread crust side-down on the pan, and cook until grill marks appear and the bread is crusty—2 to 3 minutes. Flip the bread over, then press it down to ensure good contact with the pan; continue to cook until grill marks appear and the bread is charred in spots—2 to 3 minutes more.
  2. Remove the bread from the heat and and rub the cut side with the cut side of the garlic, going over the bread a few times. Then rub the bread with the cut side of the tomato, squeezing the juice out of the tomato and onto the bread as you do so.
  3. Sprinkle the cut side of the bread with the salt and a little extra olive oil. Serve hot and enjoy!
: @NikkiDinki

: @NikkiDinkiCooking
 

Find more recipes like this in MORE VEGGIES PLEASE!


You might also like these recipes:

Grilled Romaine + Radicchio Salad with Honey-Orange Dressing

IMG_3075.jpg

I LOVE this salad.

Yes, LOVE.

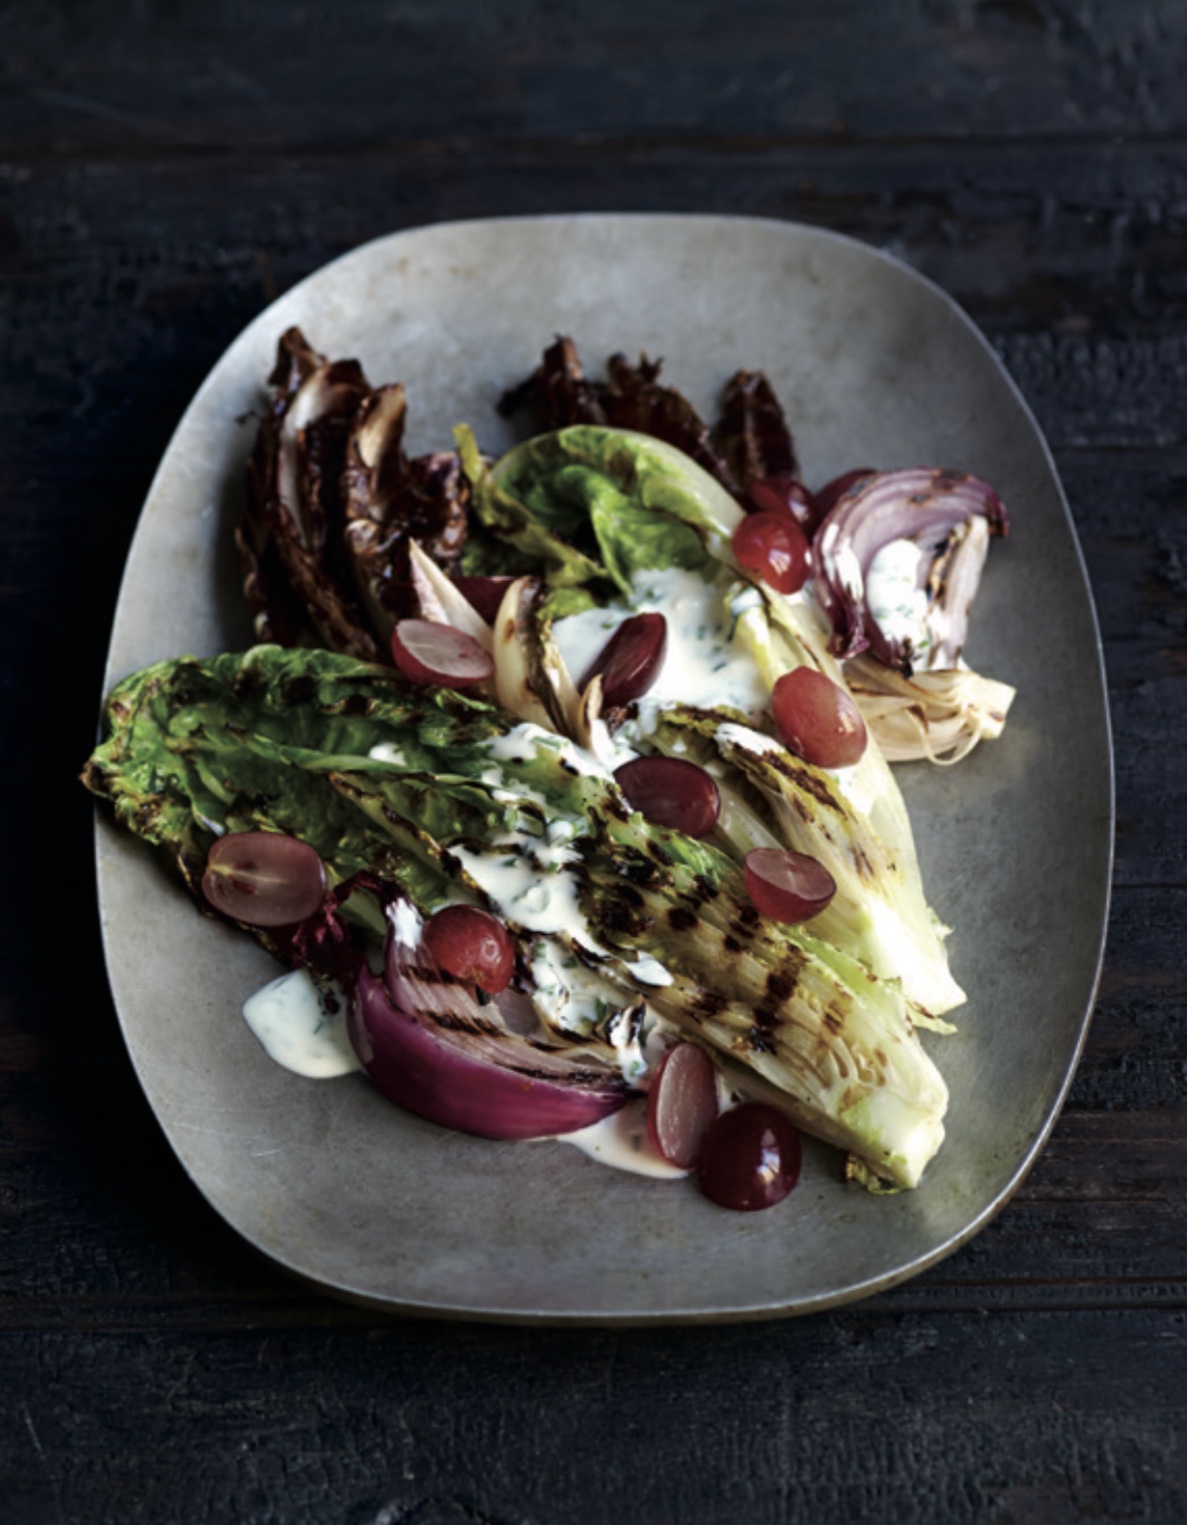
The char from the grill, the slightly bitter radicchio sweetened up by a dressing of honey and orange, and then the burst of fresh grapes to brighten up the smokiness.

Make this for your next dinner party, make it tonight, heck make it for breakfast—just make it!

Grilled Romaine + Radicchio Salad with Honey-Orange Dressing

servings: 4; makes about 1 cup dressing

Honey-Orange Dressing:

  • ½ cup Greek yogurt
  • ¼ cup mayonnaise
  • ¼ cup orange juice
  • 1 tablespoon honey
  • 1 teaspoon white wine vinegar
  • ½ teaspoon kosher salt
  • 1 teaspoon finely chopped chives

Romaine + Radicchio Salad:

  • 2 romaine lettuce hearts, cut lengthwise into 4 wedges
  • 1 radicchio, cut lengthwise into 8 wedges
  • 1 red onion, cut lengthwise into 8 wedges
  • 2 tablespoons olive oil
  • 1 teaspoon kosher salt
  • 1½ cups halved red grapes

Honey-Orange Dressing:

  1. Add the yogurt, mayonnaise, orange juice, honey, vinegar, and salt to a medium bowl. Whisk together until well blended; then whisk in the chives.

Romaine + Radicchio Salad:

  1. Heat a gas or charcoal grill (or plan to use a grill pan). Use a pastry brush to brush the oil over all surfaces of the romaine, radicchio, and onion wedges; then sprinkle the salt evenly over them.
  2. If not using a grill, heat a grill pan over high heat. Working in batches if necessary, arrange the romaine, radicchio, and onions on the hot grill or grill pan. Cook until all pieces are slightly wilted and charred on all sides—1 to 2 minutes per side for the romaine and radicchio, 2 to 4 minutes per side for the onions.
  3. To serve, divide the romaine, radicchio, and onions among 4 plates. Ladle one-quarter of the dressing (about ¼ cup) over each serving. Divide the grapes over the tops.

Make It Meaty:

  • When the veggies are done, leave the grill or grill pan on and cook up a small pork tenderloin. Cut, place next to the veggies and top everything with the dressing.
: @NikkiDinki

: @NikkiDinkiCooking
 

Find more recipes like this in MORE VEGGIES PLEASE!


You might also like these recipes:

Turnip No-Potato Salad

Summer is officially here!

So, of course, I’ve got summer barbecues on my mind!

And obviously that means I’ve got summer barbecue staples on my mind—potato salad, to be exact!

I think we can all agree that potatoes are great, but there are other root veggies out there that are primed for side dish glory.

Take turnips, for instance.

Turnips are a little sweeter than potatoes and make for the most amazing substitute in a “potato” salad.

Combine them with some crunchy celery, a hit of bacon, and a simple dressing made of mayo and Greek yogurt.

Voila!

You’ve got a potato—I mean a turnip—salad to die for!

Turnip No-Potato Salad

servings: 3 cups of salad, serves 4

Ingredients:

  • 5 small to medium turnips (about 1½ pounds), cut into ¾-inch cubes (about 5 cups)
  • 1½ tablespoons balsamic vinegar
  • 1 tablespoon olive oil
  • 1½ teaspoon kosher salt
  • ½ teaspoon ground black pepper
  • 2 slices thick-cut bacon
  • ¼ cup mayonnaise
  • ¼ cup Greek yogurt
  • 1 tablespoon pickle juice
  • 1 teaspoon whole-grain mustard
  • ½ teaspoon paprika, more for a garnish
  • 2 stalks celery, thinly sliced into half-moons (about ¾ cup)
  • 3 scallions, thinly sliced (about ¼ cup), more for a garnish

Directions:

  1. Preheat the oven to 425°F. On a rimmed baking sheet, toss the turnips with the balsamic vinegar, oil, 1 teaspoon of the salt, and ¼ teaspoon of the pepper. Bake the turnips until they are tender and lightly colored—20-25 minutes.
  2. While the turnips bake, heat a large skillet over medium heat. Add the bacon and cook it until it is crispy—6-7 minutes. Transfer the bacon to a paper towel to drain, then coarsely chop it and set it aside.
  3. In a large bowl, whisk together the mayonnaise, Greek yogurt, pickle juice, mustard, and paprika. Add the turnips, celery, scallions, and three-quarters of the bacon. Toss this mixture to combine, and season it with the remaining ½ teaspoon salt and ¼ teaspoon pepper.
  4. Garnish the salad with the remaining bacon, along with more scallions and paprika.
: @NikkiDinki

: @NikkiDinkiCooking
 

Find more recipes like this in MORE VEGGIES PLEASE!


You might also like these recipes:

Blooming Tomato

Blooming Tomato 7 small.jpg

Why should onions have all the fun?!

Forget the Blooming Onion (though it is undeniably delicious), because this summer the Blooming Tomato is taking over!

Blooming Tomato 3.jpg

I’m always looking to do something new with veggies—to transform them into something special.

And sometimes just cutting a veggie in a different way can accomplish that goal...

Blooming Tomato 2.jpg

This tomato becomes the centerpiece of a salad, and suddenly the salad is an experience—not just some veggies tossed together on a plate.

Blooming Tomato 1.jpg

The trick is to cut it into wedges while leaving the bottom center intact.

Blooming Tomato 6.jpg

Then top it as you like!

I’m going with Caesar dressing, lettuce, bacon, croutons—and to make it really special, some crab.

And just imagine this with some summer heirloom tomatoes!

Oh man, get ready for a lot of Blooming Tomatoes on my Instagram!

Blooming Tomato 5.jpg

Blooming Tomato

servings: 1; makes 1 salad

Ingredients:

  • 1 bacon strip
  • 1 large tomato
  • Pinch kosher salt
  • Pinch ground black pepper
  • 2 tablespoons Caesar dressing
  • 1 cup shredded romaine lettuce
  • ¼ cup croutons, cut into small pieces
  • Crab meat (optional)

Directions:

  1. Heat a small nonstick skillet over medium heat. Add the bacon and cook until crisp—6 to 7 minutes, turning once. Then transfer the bacon to a paper towel to drain.
  2. While the bacon cooks, remove the tomato’s stem and place it stem-side-up on a cutting board. Then cut the tomato into 8 wedges making all of your cuts on the stem side and leaving the bottom intact (first cut the tomato in half one way without cutting all the way through, then cut it in half the other way without cutting all the way through, and finally cut each quarter in half without cutting all the way through—for 8 even wedges).
  3. Next, sprinkle the cut tomato with the salt and pepper to taste. Drizzle the dressing over the tomato, fill it with the shredded lettuce, and top it with the croutons and crab meat (if desired). Finally, when the bacon has finished cooking, remove it from the pan, crumble it over the blooming tomato, and serve.
: @NikkiDinki

: @NikkiDinkiCooking
Blooming Tomato 4 small.jpg
 

Find more recipes like this in MORE VEGGIES PLEASE!


You might also like these recipes:

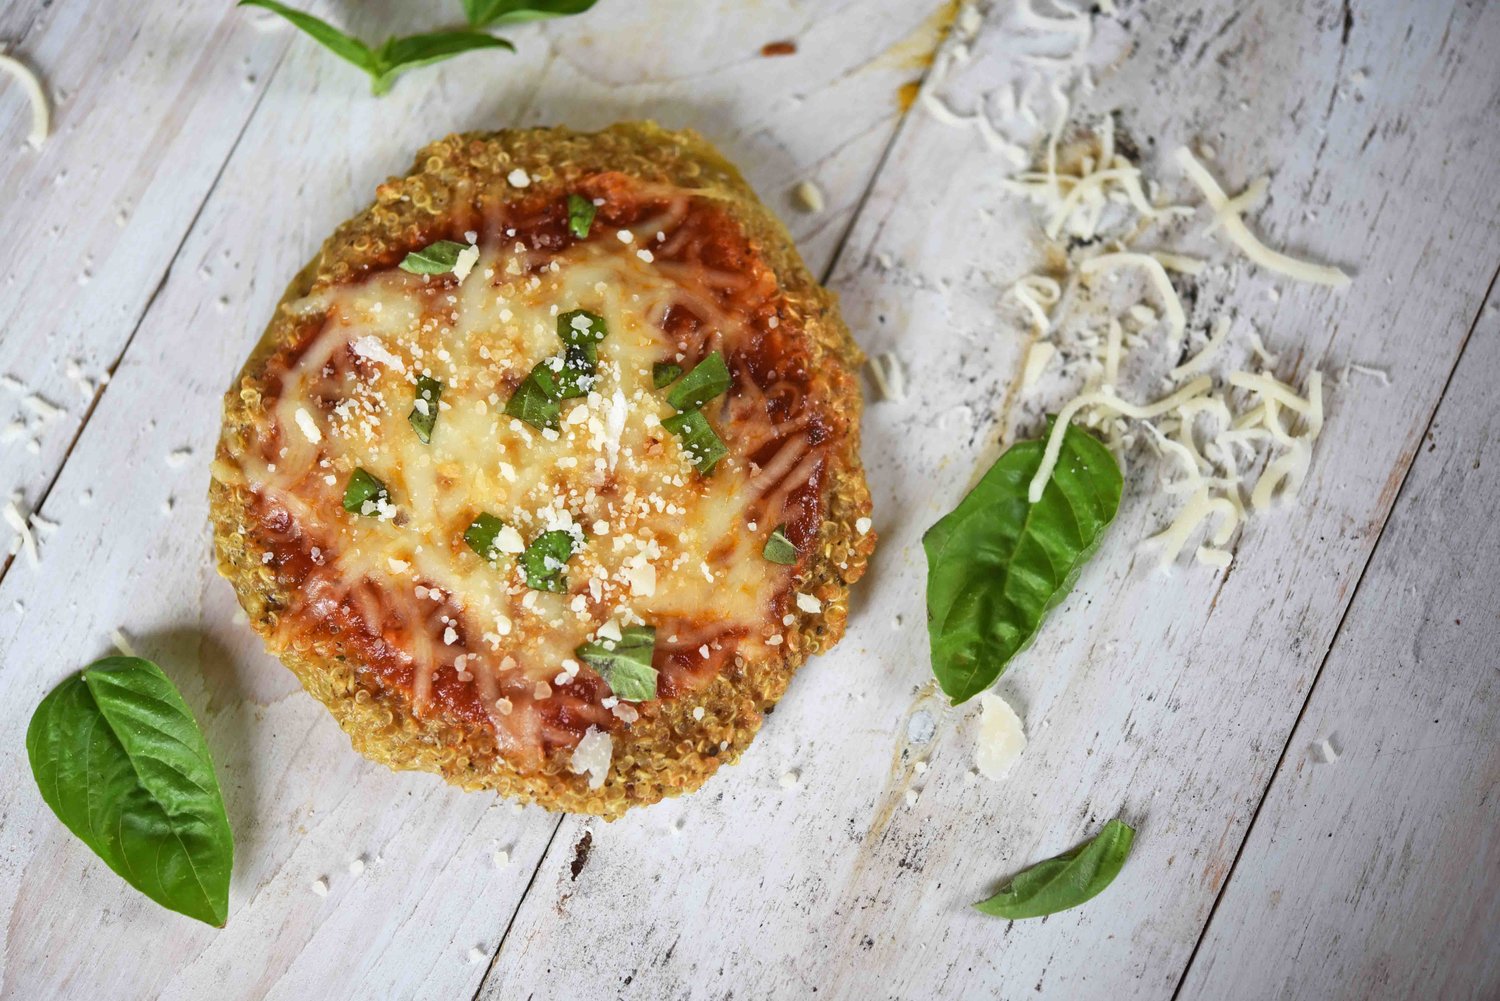
Quinoa Crust Cheese Pizzas

Quinoa Crust Cheese Pizza_SMALL.jpg

My kids have LOVED pizza since before they could even say “pizza!”

N_275.jpg

This obviously means that we have pizza once a week in our house (or, possibly four times a week?).

Quinoa Crust Cheese Pizza 1.jpg

Often we go out to one of our local pizza places and then eat our slices in the park.

But lately I’ve been trying to find a version I can make at home that's a little healthier—but still satisfies our need for pizza!

Quinoa Crust Cheese Pizza 2.jpg

These quinoa crust pizzas are remarkably easy.

You just cook up some quinoa and mix it with the eggs—which believe it or not—gives you a nice, sturdy crust.

Quinoa Crust Cheese Pizza 3.jpg

If you're trying to understand how that wet mixture of quinoa, eggs, baking powder, and Italian seasoning forms a crust, you'll have to trust me.

It firms up so beautifully in the oven and is one of the most robust alternative-type crusts I've ever made.

Quinoa Crust Cheese Pizza 4.jpg

This crust has a slightly wheat-y taste, which my kids don’t mind at all.

But if you have an extra picky eater, try making the crust on the thin side and loading on the toppings.

This will allow the focus to be more on the flavors of the sauce and cheese rather than the quinoa.

Quinoa Crust Cheese Pizza 5.jpg

This is the kind of meal I love to make because you don’t feel like you're being healthy—you just feel like you're eating pizza!

Quinoa Crust Cheese Pizza 6.jpg

These are also great to freeze so you have individual-sized pizzas ready to go anytime!

Quinoa Crust Cheese Pizza 7.jpg

Quinoa Crust Cheese Pizzas

servings: Eighteen 4-inch pizzas

Ingredients:

  • 1½ cups quinoa
  • 6 large eggs
  • 1½ teaspoons baking powder
  • 1½ teaspoons Italian seasoning
  • 1½ teaspoons kosher salt
  • 2 cups pre-made pizza or tomato sauce
  • 2 cups shredded mozzarella (16 ounces)

Directions:

  1. Preheat the oven to 450°F. Rinse the quinoa in a mesh strainer and then transfer it to a medium saucepan. Add 3 cups of water and bring to a boil over high heat; cover the pan and turn down the heat to maintain a simmer. Let the quinoa cook until it is tender—10 to 15 minutes, then transfer it to a medium bowl and let it cool.
  2. Mix the eggs, baking powder, Italian seasoning, and salt in a small bowl. Then add this mixture to the cooled quinoa and stir to combine.
  3. Line a baking sheet with parchment paper and pour the quinoa onto it; flatten and shape it with your hands into 4-inch-diameter rounds (using about ¼ cup of dough for each round), ¼- to ½-inch thick.
  4. Place the crusts in the oven and bake them until they are golden brown—about 15 minutes. Remove them from the oven and top each with about 2 tablespoons of the pizza or tomato sauce, then 2 tablespoons of the cheese.
  5. Return the pizzas to the oven until the cheese is melted—5 minutes more.

Notes:

  • If your kids are weary of the quinoa crust, try adding some extra toppings so you have a lot of sauce and cheese and just a little crust in each bite. Another option is to make the crusts a little thinner.
  • To Freeze: Let the crusts cool before adding the toppings; once cooled, add the toppings as in Step 4. Freeze the pizzas topped, but not baked. To heat from frozen, bake at 450°F until the cheese is melted and the crust is thawed through—7 to 10 minutes.
: @NikkiDinki

: @NikkiDinkiCooking
Quinoa Crust Cheese Pizza 8.jpg
 

Find more recipes like this in MORE VEGGIES PLEASE!


You might also like these recipes:

Zucchini Crostini with Pomegranate Goat Cheese Spread

Putting the words “zucchini” and “crostini” together made for a lot of fun as they rolled off my tongue…

So I decided to create something to go along with those words that would be just as fun to eat. 

And here you have it! You can have fun saying—and eating!—your Zucchini Crostini! 

Zucchini Crostini with Pomegranate Goat Cheese Spread

servings: 15 Crostini

Ingredients:

  • 4 ounces cream cheese, at room temperature
  • 2 ounces soft goat cheese, at room temperature
  • 2 teaspoons minced fresh thyme leaves
  • Zest of half a lemon
  • ½ teaspoon kosher salt
  • ¼ cup dried cranberries
  • 1 large zucchini, cut diagonally into fifteen ¼-inch-thick slices
  • ¼ cup pomegranate seeds

Directions:

  1. Blend the cream cheese, goat cheese, thyme, lemon zest, and ¼ teaspoon of the salt in a medium bowl. Stir in the cranberries, distributing evenly.
  2. Sprinkle the remaining ¼ teaspoon salt over both sides of the zucchini slices and arrange the slices on a serving platter. Divide the cheese mixture smoothly over the slices and top each with a generous sprinkling of the pomegranate seeds.

Notes:

  • KEEP IT SIMPLE - This pomegranate goat cheese combo is one of my all-time favorite spreads and it works great on classic crackers or bread, too. Just be sure to fold the pomegranate seeds into the spread if you use it this way.
  • While I’m crazy for the goat cheese, these zucchini crostini are super versatile and can be topped with anything from hummus to crab.
  • All you can find are small zucchinis? Not a problem. Just cut the zucchini on more of a diagonal for a larger slice.
: @NikkiDinki

: @NikkiDinkiCooking
 

Find more recipes like this in MORE VEGGIES PLEASE!


You might also like these recipes:

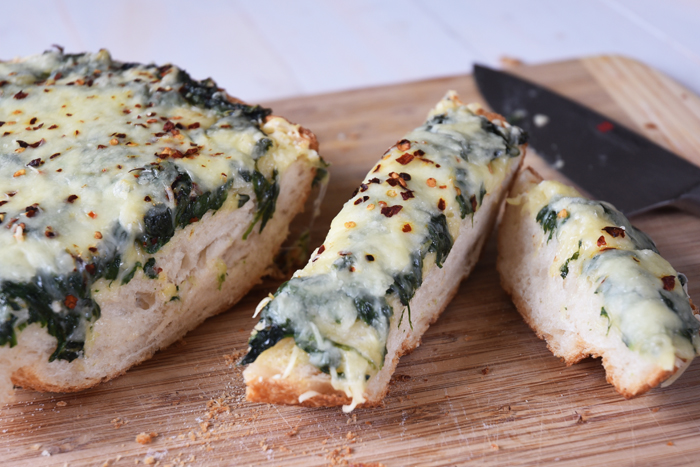
Creamed Spinach Garlic Bread


Sure, you could have regular old garlic bread.


Yes, it is warm, garlicky, and of course, buttery.


But why not throw some creamed spinach into the mix, creating a garlic bread with a creamy, spicy base that also gives you a Popeye’s dose of spinach?!


Read More